Night-time temperatures are into the high teens, so I thought it was time for an update.
I finished sealing this week, although I still need to finish the waterwall. Currently that is half completed but there are two big water tanks and water bottles all around the outside.
According to my measurements, the greenhouse is holding a night-time temperature of about 15 degrees above the outside. When the temp outside is 19, the inside temperature is 32. Outside is 17, inside is 30, and so on. Not healthy for the more fragile plants, but still good. I'm hoping that the waterwall completion will bring that up by another five degrees.
However, I have noticed that the area near the block wall remains considerably warmer--when the water bottles by the glazing on the south were completely frozen, the big tanks in back by the wall weren't even slushy. The tomatoes back there are still alive, while the cilantro planted in front is struggling a lot.
I'm going to try to bring the tomatoes through the winter, just to see if it's possible. I'm getting a good idea of what's possible with this structure (for the winter, anyway) and it looks like we'll have a 10 to 11 month growing season. Which is exactly what I was hoping for. 12 month would be great, but no time for the structure to freeze off any bugs or mold. With a one month solid freeze, we should be able to reduce or eliminate year-round indwellers. :)
I knew that slanting the roof to the north would reduce the heat absorption to some extent--I actually wanted a more slanted roof, but got about a 10 degree slant. I was willing to trade off a little bit of winter growing time for (hopefully) less heat in the summer. We'll have to see on that one.
See the first greenhouse post here.
Friday, December 8, 2017
Monday, November 20, 2017
My greenhouse is up!
I've been planning this thing for years. It came together sllllooooowwwwwllllyyyyy, but with the help of some amazing friends, it's done!
The interior space is about 9x11. It backs onto a cinderblock wall with soil behind it. It has a door on east and west, in the direction of the prevailing winds. For temperature control it has a water-filled plant pot (the kind they grow trees in) in each corner. In future years those will be replaced with closed barrels so there's no problem with insects. Eventually it will have a waterwall against the cinderblock, made of gallon milk jugs filled with water. I started working on that piece today.
I had planned for the roof to slope sharply to the north (northern exposure) but it didn't work out that way. When greenhouses were invented, it was for areas with cool summers and frigid winters--the additional heat was very necessary, year round. People have continued to build that way, simply because it's traditional, but one of the main problems with greenhouses in more temperate areas is getting rid of excess heat.
The idea behind having the roof face north is that during the winter the greenhouse would receive full exposure on the front face, while during the summer it wouldn't hit any surface straight on, the roof not being angled correctly for sun exposure and the sun at a high angle so most of the light would also miss the front.
Because of some oops moments during construction the roof is angled north, but not sharply--perhaps a 10 degree slant. So rain runs off, but the sun will still hit it. I'm going to do an experiment during the summer and put a shade cloth over the roof, simulating what would have happened if the plan had remained as I originally had it. The water also runs off the back of the roof, into the forest garden area.
There will eventually be a small (1 foot wide) garden area immediately around the greenhouse to take advantage of the extended warm period.
Currently, when the greenhouse is not fully sealed and there is no waterwall in place:
Night-time temperatures: 8 to 10 degrees above outside
Day-time temperatures: 15 degrees above outside temps when cloudy, up to 40 above when sunny
So theoretically daytime temps could go down to 18 without too much risk of freezing. Night-time temps could go down to 22.
The tomatoes are still alive (if struggling). Cilantro is still alive. Greens are up and should be ready to start picking mid-December.
I've had several suggestions for additions and improvements, but for this first year I'm keeping it entirely passive. I want to know what the structure is capable of before I start making changes.
Wednesday, August 30, 2017
Dry farming (in a sense)
I try to grow most of what we eat. There are a lot of reasons for this, many of them health related. Argue as you will, our water, air and soil is scarcely healthy and we add stuff to them that makes it worse. When I plant, I know precisely what is going into my plants, into my soil and into my mouth.
I can't grow it all at this point, but I'm working on what I can.
Part of the problem with growing in this area is water. I use far too much water for thirsty lawns (which will be going away at the first opportunity!). Other than that my major water use is for food producing gardens, fruit trees, and grape vines. Unfortunately, municipal water is well known for harboring such gems as pharmaceuticals, industrial byproducts and agricultural waste. Then there's the nasties that we ADD to the water to make it "Safe." Right.
The best option then, would seem to be to produce only what I can grow without municipal water. Or maybe not. That would be a yard full of sand and rock, basically. I've done work to make the area more self sufficient, but it works to a certain point and then I have to look for something else that take me that tiny step closer to my goal.
I started doing some research on dry farming, farming that relies only on the water available on a site rather than irrigation or municipal water. From my research it appears that dry farmers fit primarily into two categories.
1) Farmers who farm during the growing season in areas with high humidity, low seasonal temperatures, mild winters and deep, rich (primarily clay) soils. The information I've been able to find indicates that soil between 6 and 8 feet deep is ideal, deeper is better. It must be a mix of sand, clay and organic matter to hold the water with no impermeable or partially impermeable layers to stop water flow.
2) Farmers who leverage mild winters and plant their primary crop (often winter grains) when the rains are falling (September through May) then harvest in the spring. These farmers can grow on poor soils, have low humidity, but also low seasonal temperatures and mild winters with little or no snow.
I do not fit in either category. My soil is straight sand, with a layer of rock underneath. Temps consistently get up into the 100's in the summer and below freezing in the winter. On the other hand, I have grapevines and fruit trees that have thrived with little water for 30 + years, digging their roots deep. So it is possible.
Additional research brought up a third group, farmers who grow in arid to semi-arid lands, in areas that have harsh winters and brutal summers. In fact, the original definition of "dry farming" included only those areas that got less than 20 inches of precipitation per year. By this definition, #1 up above isn't dry farming, or only in the loosest sense, in that they do not use irrigation or municipal water.
So with dry farming defined, how do I use it?
The basic principles of dry farming seem to be:
Keep the water in the soil
Soil treatment
Choose crops that work
Plant drought tolerant varieties
Fallow season
Plant spacing
Water can be kept in the soil through a variety of techniques--mulching (either dust mulch, organic mulch, or rock mulch), covering the soil, shading the soil, controlling wind, and controlling temperature. Water primarily leaves by going up or down--evaporation or dripping down to the water table. By choice, if you must have one or the other, water table is probably best since the roots can chase it down. Evaporation can be used, providing you have sufficient ground cover to catch the evaporating water and return it to the soil. Ideally the soil should be a clay loam, but we're not doing "ideal" here. High organic matter is of utmost importance. If you start with poor soil, work to amend it until it can be used.
Soil is a loose web of particles of various sizes. Water is a perfect (liquid) crystaline matrix. Through adhesion it will try to fill the space with itself, climbing up through the soil if there is a path for it. That path is created by the density and makeup of the soil. By lightly packing the soil under a seed, you create the path for the water to fill that space, wetting the soil if there is any water in it. Traditional dry farming uses multiple implements to bring the water up from deep underground. It also pulverizes the soil on the surface to prevent evaporation in a sort of dry (or dust) mulch. Originally it appears that this process was used because organic mulches were not available in the areas where dry farming was pioneered. Even now, organic mulches on the scale required by a dry farm are impractical at best.
Choose crops that create a large root system. Many "modern" varieties have very little root, since they're intended to be grown under irrigation. Primary crops for dry farming must be able to chase the water, rather than having it come to them.
When you've chosen your crop, choose varieties that are specifically drought tolerant, and that doesn't mean drought tolerant under irrigation. If it can't thrive under those conditions, it doesn't deserve to be planted. Look for phrases like "prone to cracking" or "don't water too much" because these indicate a variety that may do better with less water. Heirlooms are likely to be more drought tolerant than "new" varieties.
In arid areas it is necessary to let the soil moisture build up over an extended period of time. Every other year planting is ideal, but at minimum every four to five years the soil should rest and collect water. Letting an area "lie fallow" also increases fertility, particularly if you cover crop or have animals on it during that period. Taking into consideration that a cover crop (according to the information I found) will use up part of your stored water.
And last, plant spacing. This seems to be key in dryland farming, and this is where I have the hardest time fitting my head around it. With the basic principles of dry farming, plants are to be given a great deal of space. The idea seems to be that with less competition the plant roots will spread further, with more space to take water from, and produce more. This may be the case. I don't know, as I've never tried it. I have a 30 x 50 foot garden and planting five or ten feet apart simply isn't practical. With pumpkins or other squash I can almost see it, since they spread to fill the available space. But corn? Beans? Tomatoes? Potatoes? In fact, the information I read said potatoes should be spaced even further apart than that. Supposedly, without the competition of other roots in "their" space, the plants have more available water in the soil.
I'm not sure this plant spacing business makes sense, but I'm going to try it next year in a small area and see what happens.
On my scale I have no problem finding organic mulching materials, and dust mulch might as well be Santa Claus since I have no clay in my soil. I can plant under and around trees, create windbreaks, and plant in partial shade. I have plants I think will work for waterless planting and I'm going to try deep watering, watering through a pipe to force the plants roots deep.
Every outside input becomes a handicap if it's ever unavailable. Right now that means I need water independence, so that is what I'm working toward. Maybe it'll never happen, but each failure and success brings me closer to the ideal.
First Update
Second Update
Monday, August 21, 2017
Adaptation
I harvest my own seeds. It's been a while since new seeds came into my yard, but this year I had a friend who wasn't able to have her own garden so I have several varieties of "new" tomatoes, as well as various summer and winter squash and pie pumpkins. It almost feels like I'm being invaded. :) By seeds and plants, not by people.
I don't want anything in my yard to be genetically modified, and as we move more and more toward a Monsanto controlled and owned food supply the list of things being genetically modified grows every year. Apples, sugar beets, corn, wheat. Several hundred varieties of GMO potatoes were approved a few years ago, and while they are currently "not available to the public" I would prefer not to chance my stocks being contaminated. There are a number of reasons for that, but it comes down to unproved safety, the litigious nature of Monsanto, and distrust of a government supported monopoly. They want complete control of our food supply and I'm not going to participate in that.
The only thing in my yard that could possibly be GMO is the corn, because of pollen drift. Everything else is hand pollinated and bagged, or it's built in such a way that accidental crossing is unlikely/impossible (beans, peppers, tomatoes). I've had most of these seeds for upwards of ten years, and some all my life. Others were gifts from people I know back before those particular items were approved for genetic modification.
My days of indiscriminately collecting seeds at every opportunity are over.
Then there's a little quirk of my property that just seems to kill everything. Seeds don't germinate, or they germinate and die, or the bugs get them. First generation I think I probably have a 30% success rate for most things. Some things grow but never flower. Others flower but never fruit. Some don't grow at all.
I've learned to live with it. It's just one more reason NOT to introduce new plants, because it's the first generation that's like this. If the plant grew on my property and I got seeds, the 2nd generation plants will be better. Third generation seeds will thrive.
I've been growing some unknown variety of watermelons for about five years now. Saved from a watermelon we had at a family gathering when I was maybe fifteen, it has adapted quite well. This year I planted several other varieties and waited anxiously to see the female blossoms. Nothing, nothing, nothing. Then, before I'd even seen female blossoms, I had three fruit four inches long on the plant from my own seeds. The others were weeks behind.
Adapted. Someday all my food will be adapted to my soil, my wind, my air. And it will be A. Maze. Ing.
Thursday, July 20, 2017
Gluten addiction and overdose
I was talking to a friend earlier and we got on the topic of gluten intolerance.
I have a number of friends/family members who can't tolerate even the slightest amounts of wheat. I had a friend over a few years ago and we were walking through my yard--her son couldn't even touch the wheat stalks. There are a number of problems, though.
Wheat, in its natural form, is very filling with a lot of nutrients.
In the mid 1900's, scientists began deliberately crossing wheat with other grasses in order to make it more economically feasible--shorter stalks, less bulk, more energy put into wheat production rather than leaf and stalk, more wheat per stalk, resistant to fungus and disease, etc.
One side effect of these changes was a massive increase in the amount of gluten in the wheat, which made it rise more easily and with less effort. Demand for the altered wheat increased, to the point that the majority of the wheat commonly used today is descended from these crosses. You can still get "heirloom" wheat, but it's more difficult to find. It also won't rise as well. Some older grains have as little as 3% gluten, while modern bread flours have many times more.
The habit of adding gluten to baked goods is an additional risk. Many flours have gluten added as part of processing, and people add gluten in the form of "dough enhancers" when they bake.
This results in something I call gluten overdose.
The human body is designed to function on a hunter-gatherer diet--lots of exercise, plain water, meat, herbs and seeds. This includes the ancient relatives of wheat. We are supposed to eat this stuff. It's part of our makeup. But if your diet was 90% meat, enhanced with protein powders, protein drinks and protein supplements, you wouldn't stay healthy for long. The body is simply not designed to handle overdoses on that level.
If your diet was 90% watermelon, supplemented by green food powders (not so many options in this direction, but you get the point) you wouldn't stay healthy for long.
And yet we seem to think that we can live majority on grains that have been supplemented with a product nature doesn't produce in those quantities and it won't affect us, our digestive systems, or our genes.
Our society, in my opinion, suffers from a gluten overdose. Those sensitive to these substances are getting sick, and it's gumming up the digestive systems of the rest. Depressed immune systems because of bad dietary choices result in even more, and more violent, "allergic reactions" to the substances causing the problems.
Celiacs is real. Gluten intolerance is real. What I think we've mostly been missing is the link between quantity and overdose.
Thursday, July 13, 2017
Updates
Watermelon:
I have 2 Orange Glow, 5 Sugar Baby, and 4 that may be either Congo, Jubilee, Ali Baba or my own saved seeds (variety unknown). I'm hoping for one of each, but that's unlikely. At least three of the four, anyway. This year I'll be mixing them all to try to come up with a variety that does well here. Later years will focus on cold, drought and heat tolerance, but right now I need to start the process. I'll keep pure seeds of each variety, but mostly plant from my mixed variety for my own use. The larger plants already have male blossoms.
Beans:
I planted green beans (our own heirloom), kidney beans, pinto, hidatsu shield, black turtle, great northern white, yin-yang and hidatsu red. So 7 varieties of dry beans, and one of green. Only about a dozen plants of the green beans survived, so those will mostly be kept for seed. Kidney, Hidatsu Red, Hidatsu Shield, and pinto are runner beans, while the rest are bush. This year I'm just testing to see what we get the best yield from, which don't survive in our yard, etc. From this year's harvest we'll try the taste, then likely plant the four or five that do the best. Kidney is already a problem--as far as I can tell none came up so I'll probably try that one again next year in a more controlled environment--meaning that rather than just scattering it in various areas of the yard I'll put it in the main garden with the rest of the beans.
Fruit:
We lost almost the entire almond, peach and nectarine harvest with that late freeze. I think there are maybe a dozen almonds on the tree, but no peaches or nectarines. Not a big deal, as we still have peaches and nectarines from previous years. No walnuts, either. The grapes got bitten by the late freeze as well, but they've recovered well. It appears that the fruit won't be affected, particularly for the green grapes. I'm pulling several grapevines out this year, as they don't fruit at all. One is in the raspberries so there are other reasons for pulling it. So I'll "lose" three (non-producing) grape vines and open up that space for other things.
I'm actually thinking of pulling out the filberts and replacing them with something else. Research indicates that the catkins and flowers are sensitive to frost and emerge in March. I'm not sure--I've never seen blossoms at all--but that would definitely be a problem. At the moment I'm leaning toward pistachios, but I want to do more research. Some plants simply do not do well in my yard, and there's no way of knowing until I try.
Squash:
Most of the squash were planted at random around the yard. 4 zucchini under the walnut to see how they handle the juglones. They look good so far. The winter squash are struggling, likely because of lack of water and too much heat. I planted two blue hubbard seeds, but one has indented leaves and the other entire leaf margins so I'm guessing there's some crossing going on. If both grow blue hubbards, great. If not, I have a surprise coming. I have two spaghetti squash, three small (pie) pumpkins and five large pumpkins. Dad insisted on the large pumpkins. Other squash are either cucumbers, yellow crookneck, yellow straight-neck, spaghetti squash, cantaloupe or honeydew. I'm keeping a map and I'll keep seeds from each. I plan to throw out or give away the "parent" seeds, since seeds grown in my own yard seem to do much better. I haven't decided whether I want to do crosses on the squash.
Other:
The greenhouse is the major project for this year. It needs to be finished ASAP so I can start the late season crops there before planting out. I need to be able to record the temperatures so I have a better idea of what can grow IN the greenhouse and what needs to be brought back inside for the winter. I'm hoping (unlikely, but hoping) that I'll be able to leave the citrus in there over the winter.
Friday, June 30, 2017
Tomato update
This year I've been keeping a lot of records so I have a better idea of what I have before I start changing things.
Well, realistically I've already started changing things, but I'm still keeping records so I know where I'm headed.
This year I have 15 tomato plants from my seeds and 5 from other sources in the main tomato area. I also planted two varieties in the main garden (since research showed they were exceptionally large) and one under the almond as a test. The one under the almond is a Japanese Black. The two in the main garden are Copia and Kellogs Breakfast. All three are heirloom varieties.
Those scattered around the yard haven't started blooming yet so I'm not including them in this update.
"My" tomatoes are the result of many generations of taking seeds off of whatever came up. So some are probably recognized varieties while others are mutts. I don't care what they are or where they came from as long as they grow and thrive in my yard.
All of the fifteen were cold tolerant, although one struggled. I planted seedlings in early April and replaced those that died in the cold even with protection. Seven bloomed before the end of May. All fifteen now have fruit on them. One appears to be heat tolerant and just started fruiting as the heat hit.
Of the fifteen, three have heart-shaped fruit and one (the possibly-heat-tolerant) appears to be paste. I've never kept any seeds from a paste variety, so that one is either a fluke/sport or a descendant of a hybrid that had paste in its ancestry. The rest are round.
The additional varieties added this year are Arkansas Traveler, Black Krim, Pink Tiger, Amish Paste, Copia, Kellogs Breakfast, and Japanese Black. Copia, Kellogs Breakfast and Japanese Black are just starting to bloom. The others haven't bloomed yet. Last year I added an heirloom Italian variety, and the year before I started saving seeds from Mortgage Lifter.
Black Krim will most likely be eliminated as a seed donor, as it is still the same size it was when it was planted a month ago.
I'm deliberately crossing the "new" varieties into my lines. I'm also deliberately crossing each of my plants with others in my lines so there's more genetic diversity. I'll plant more tomatoes next year than usual because I don't know how many of the crosses will carry the cold tolerant gene. I'll continue to plant out in April to select for that, and eliminate anything that doesn't thrive.
I am NOT crossing the new varieties with each other. Either they're bred into my lines or they're left alone. I'll keep seeds for each variety in storage, but mostly plant my own genetically diverse lines for my own use. Once I see how that's going I'll have a better idea of what I want/need to keep.
I am specifically looking for cold tolerance and heat tolerance in a beefsteak type tomato.I won't know how it's going until at least the year after next. Next year will be the first generation hybrids. The following year will be the first stable varieties (although I'll probably still be doing some crossing) and then by 2020 I'll finally be able to see how things are working.
None have ripened yet, so I'm still waiting anxiously for that milestone.
Tuesday, June 20, 2017
Sun Oven
It's way too hot outside. There may be extra humidity, but it feels like I get slapped in the face with heat when I walk out the door. Of course I choose this moment to want fresh bread...
I refuse to turn on the oven during the summer. I doubly refuse to run the AC and the oven on the same day, and since the oven adds heat to the house, which would force the AC to come on earlier, I don't bake during the summer.
Last summer I bought a Sun Oven, an outdoor oven designed to use the sun's heat for cooking. I didn't use it, beyond one trial run to see how hot it would get.
It was a scratch-and-dent, so I expected some problems when I tested it. The latches are difficult to turn because of the way the frame is bent, but it still works.
A few weeks ago I decided I wanted zucchini bread, so I pulled out the sun oven. I've been using it ever since. Zucchini bread, banana bread, fresh wheat bread. Lunch.
I'm really enjoying the fact that I can whip up a batch of something and stick it in the oven, without being concerned about the extra heat.

The image isn't very clear, but the temperature is just over 350. The bread has been in the oven for a little under half an hour.
Notes:
1 Use oven mitts or hot pads! The outside of the unit (reflectors, glass) gets HOT!
2 Plan ahead. The best time to use (i.e., cook with) the oven is when the sun is directly overhead, most likely between 11 and 2. You'll want to allow time to prepare, and preheat prior, then cook during this period. If you plan on having lunch ready at noon, it needs to be preheated by 11, so set up by 10.
3 It won't work well on cloudy or overcast days. Even a few minutes of shade will bring the temperature down noticeably.
4 Be aware that if you need to tip the oven (for instance, if you need to begin cooking at 10:AM) the inside will be slanted. You may need to even out whatever you're cooking to avoid spills. My oven came with a leveler rack that I can't find.
5 You'll need a relatively large space, five feet across at a minimum. You want to be able to walk all the way around the Sun Oven without bumping it.
If you have space for a permanent installation (I don't, so I went for the Sun Oven) these are relatively simple to build.
Thursday, June 8, 2017
Forest Garden Update
It's only the beginning of June, and up on the hill the plants are already struggling. Rhubarb has died. Aronia are trying their best but their leaves are curling up and drying out. The apricot tree still looks good, but it's surrounded by other plants specifically to keep the root-zone cool. I couldn't do that with all the plants.
I was going to put two more dwarf fruit trees up there this spring but I couldn't justify the cost and my experiment failed miserably (I didn't get the serviceberry seedlings I expected, so no grafting of fruit-trees onto serviceberry rootstock).
Once the canopy is in place it should bring the temperature down considerably in that area, which will allow more plants to thrive. I covered the whole thing with mulch last fall, and it worked for a while, but in certain areas the bare soil (sand) has been uncovered by the wind and in other areas the water doesn't spread.
I am learning about berms and swales firsthand. Namely, any bump or crevasse in the ground will STOP the water flow. I didn't even out the area up on the hill, didn't dig or really change the topography in any way, so there are rocks that divert the water, patches of tree roots that divert the water, places where the water pools rather than flowing because of soil composition. The path I put in, paving stones only two inches thick, stops all water flow. So either I can remove the path (which I don't want to do) or I can plant much more drought tolerant plants on the downhill side.
It's a work in progress. I dug up the elderberry and planted it in a pot so it can recover. It was literally dying up there, and when I dug down to take it out I learned why. I'd deliberately planted it right by a bunch of logs, under the assumption that the logs would hold water and feed it back into the soil as the soil dries out. Unfortunately what seems to be happening is that the logs absorb all the water from the surrounding soil (they're covered with fungus hyphae) and never give anything back. There are also rocks, so the rootball of the elderberry was crammed into this tiny little space less than 6 inches across in totally dry soil.
It occurred to me this morning that the majority of what I have up there right now are spring plants--greens, rhubarb, etc. Most everything can be expected to die back by late spring/early summer, leaving the soil (again!) unprotected from the worst of the sun. I need to plant summer and fall food bearing perennials (if I can afford any) so the space fills in when the spring plants die back in the heat.
This week I'll transplant a couple of echinacea seedlings and scatter beans around. And melons. And nasturtiums. Maybe that will help.
Monday, May 8, 2017
Seed float test
I've always been told that if seeds are viable they will sink, if not they will float. For most things this seems to be accurate, probably due to the fact that a dead seed will have more air and less water inside.
I have a bunch of leftover (?!) fruit seeds this spring, so I decided to test it.
Apricots:
17 floated, 14 sank (in the shell):
3 floated when in the shells and when I cracked them
---One sprouted on 4/4
14 floated when in the shells but sank when I cracked them
---One sprouted on 4/2
---One sprouted on 4/20
8 sank both times
---One sprouted on 4/2
---One sprouted on 4/3
6 sank when in the shells but floated when I cracked them
No visible difference. I separated the seeds into those groups.
After soaking 24 hours I filled the bottles with sphegnum moss to soak up the water and create the ideal microclimate for the seedlings. All of the seeds appear to be healthy. One of the sank/sank batch split within 24 hours.
They've been in the refrigerator all winter so I think the "cold stratification" criteria has been met.
As if 4/28, all the remaining seeds are still firm but no more have sprouted. Based on this test I don't see any difference in sprouting rates between the seeds that floated and the seeds that sank. The others could probably sprout eventually, but this test is over.
Monday, April 10, 2017
Food Forest #3
The idea behind a food forest is to create an artificial forest, which functions as a forest with little or no input, and which provides food for humans, birds or wildlife. Mine is intended to provide food primarily for humans, but I'm sure the birds will get their share.
The plants I chose should do well in this area. They're all relatively drought tolerant, and anything that doesn't make the cut will be weeded out eventually. I need this area to be self sustaining, and to require nothing from me. Once the trees are mature they should provide all the leaf litter necessary to sustain the reaction. Other plants will attract pollinators, protect the trees, fix nitrogen in the soil, etc. The fungus will break down the leaf littler.
Over time I will introduce other pieces of the balanced environment, until the food forest can thrive and grow without my help. Once established that area will provide me with various fruits, root vegetables, grains, edible mushrooms,and seasonings. It will provide food and shelter for birds, a refuge for beneficial insects, and a more sheltered environment for plants that wouldn't necessarily grow in this area.
The goal is to eventually turn most of the yard into a food forest. But I start with this little space to figure things out before I start the rest.
It's a long term project, but it's necessary.
Monday, April 3, 2017
Food Forest #2
A forest doesn't require fertilizer, it doesn't require additional water, it doesn't require any form of human intervention. Plants cluster where they fit and create their own planting zones. They naturally cluster with other plants that keep critters away. They build the perfect environment for OTHER plants and protect each other in a symbiotic fashion.
Forests exist all over the world, except in the worst cold and the worst deserts. They thrive where human thought says they should die. I think part of that is the human expectation that everything NEEDS them. Nope. Sorry. Here's your sign.
A forest naturally has seven layers.
Canopy
Under Canopy
Undergrowth
ground layer (creepers and such)
Climbing (vines)
fungus
Tubers
All niches are filled. You seldom see bare ground in nature. It's always covered by something. The forest goes down just as far as it goes up, and that area is also full of life.
In creating my food forest I wanted to cover those same bases. My canopy isn't 30 or 50 or 100 feet over the ground, so I cut out the under canopy. My canopy is the trees that would be an under canopy in a normal forest.
Canopy: Three dwarf fruit trees
undergrowth: Aronia, gooseberry, currant, elderberry
ground layer: tarragon, rue, dill, potatoes, tansy, fennel, herbs, grasses, sage, yarrow
vining: honeysuckle, luffa
root: potatoes, horseradish
fungus: winecaps (planting this year)
I'll be planting melons and nasturtiums up there as groundcover. This year is to see how everything gets established. Next spring the real fun begins.
Tuesday, March 28, 2017
Food Forest
I walked up onto the hill a few days ago and just stood there, looking down over my garden. I love this time of year, when everything is fighting to live again.
I sometimes wish I had an even higher place, where I could see the hill as well--that's going to be my food forest.
The "forest" was once a very steep hill. The neighbor behind us had a child in a wheelchair so when he built his fence he built it at the top of the steep hill rather than the bottom.
A few years ago I was in the difficult position of needing to relocate my herb garden, and the only place available was this hot, dry area where nothing grew. Not even weeds. It's straight sand, there was no water in place, wind blasted through there and blew away anything that did manage to grow.
Needless to say, the herb garden didn't do well. Rue, tarragon and feverfew thrived. Everything else died.
Then I made a discovery. That area is consistently 10 to 15 degrees hotter than the rest of the yard, even during the winter. The snow up there melted off a full month ahead.
Essentially I have a solid 1 planting zone jump, IF I can keep the wind from blowing the heat away during the winter, and IF I can control the heat during the summer. Not many plants can handle a range of 120 to -10 degrees fahrenheit.
Since the space is about 3 meters by 10, I decided that three dwarf fruit trees would be sufficient for the canopy layer. Eventually that will be one apricot and two cherries, which will help with transpiration and create shade, thus bringing the temperature down to a manageable level during the summer. By putting up a vine trellis along the east end the wind should be cut down summer and winter. So that takes care of two problems.
The other was the soil. It's almost straight sand, in spite of assertions that compost has been put up there. A few pounds of composted steer manure and a few buckets of garden soil are not sufficient. So last year I put in mulch. I buried the whole area in grass and leaves. I also spot-treated with whey when the plants appeared to be struggling. That should introduce the beneficial bacteria needed to actually build soil rather than the whole thing being just a few inches of leaves over dead sand.
I've been rewarded this year by everything coming back strong--even some I thought had died last summer! The next step will be introducing fungus. I found a few mushrooms up there last year, which I've never seen before, and this year the soil is thick with worms. Progress, right?
Monday, March 20, 2017
Celery
I mentioned in an earlier post that the celery was a wash. I planted a whole bunch (in moss, sheltered, under grow lights) and not a single one came up.
Thinking my seeds were perhaps to blame, I did a germination test. I scattered a pinch of seeds in a plastic bag on a wet paper towel. It took a while, but every single silly seed sprouted. It was like the celerypocolypse, with zombie celery popping up everywhere.
Celery is notoriously picky, and if I manage to grow this stuff I only want the strongest. I want the plants that will spit "not good enough" back in my face and grow in spite of my neglect. I stripped the seedlings from the paper towel with my fingers, scraped them all up and unceremoniously dumped them into the moss where I tried to start seedlings the first time. They did OK, a little yellow. When they had seed leaves I took them out of the moss and plunked them in the dirt.
So far, so good. I can see half a dozen that are sinking their roots into the dirt and laughing at my attempts to kill them. This is good. I'll try harder next time. :)
Monday, March 13, 2017
The effectiveness of a pinned post
I have one post (on vinegar craving) that still gets about 200 hits per week after five years. I can see that the posts to either side of it get more hits than most of my other posts, but few people go so far as to search out the homepage and see what I'm currently writing.
So I did a test. For three days I "pinned" the vinegar craving post, just to see if there was a difference. Taking into account that there are a LOT of comments on that post and it would take a long time to scroll down through them, I expected that the post just after it would have a few more hits. Probably just because of proximity. I think the system counts it as a view even if the individual just scrolls to it in getting past the previous post. If the skuttlebut about a pinned post driving more traffic to other posts is accurate, then the posts beyond the first should also see an increase.
During the test period the next post down (True Potato Seed update) got 18 hits, about triple the usual, but no comments. The posts below it got no more than usual.
I have concluded that the idea of a "pinned" post being a draw for traffic applies ONLY if the audience is the same for both posts.
Monday, March 6, 2017
TPS (True Potato Seed) Update
Potatoes are a root crop, right?
Most people believe that potatoes don't set seed, that they are root crop only. Like garlic, but that's another topic. In fact, most potatoes do set seed--it's only the "commercial" varieties that have been bred for male sterility, which means the flowers don't set fruit unless they're hand pollinated.
I always knew potatoes had flowers, but since I have never seen a seed pod on a potato (in spite of years of trying) I assumed the flowers were sterile and didn't go any further.
Until last year, when I accidentally ran across a mention of True Potato Seed and went looking for more information.
It's really not important to go into the details here, but this year I planted tps, or true potato seed, for the first time.
True potato seed prefers cooler weather, with normal germination temperatures being between 50 and 70 degrees. Using a heat mat will give you more consistent results, but it won't result in higher or quicker germination. The seed leaves are smaller than a radish seed, or another comparison would be the point of a pencil. I can't think of any real comparisons in the modern world, so you'll have to use your imagination if neither of those work for you. Think really tiny. The stems are about the thickness of a paperclip, and hairy.

The first batch started to germinate after about 10 days and I got 30% germination. I have since read that because of their built-in growth inhibitors (a lot of seeds have this) germination can take anywhere from five to fifty days. So 30% may not be accurate, but it's what I got. I now have 9 plants from that first batch.

The potato seedling is shown here (in the center) with tomatoes below and peppers above, all of them planted the same day. If you look really close you can see two more potato seedlings, just two leaves poking up above the soil in the two pots that look empty. This was the day after transplant into their first pots.
I'm half expecting a high failure rate this year. I hope not, but working with plants when I'm not familiar with their habits and needs gets tricky.
Most people believe that potatoes don't set seed, that they are root crop only. Like garlic, but that's another topic. In fact, most potatoes do set seed--it's only the "commercial" varieties that have been bred for male sterility, which means the flowers don't set fruit unless they're hand pollinated.
I always knew potatoes had flowers, but since I have never seen a seed pod on a potato (in spite of years of trying) I assumed the flowers were sterile and didn't go any further.
Until last year, when I accidentally ran across a mention of True Potato Seed and went looking for more information.
It's really not important to go into the details here, but this year I planted tps, or true potato seed, for the first time.
True potato seed prefers cooler weather, with normal germination temperatures being between 50 and 70 degrees. Using a heat mat will give you more consistent results, but it won't result in higher or quicker germination. The seed leaves are smaller than a radish seed, or another comparison would be the point of a pencil. I can't think of any real comparisons in the modern world, so you'll have to use your imagination if neither of those work for you. Think really tiny. The stems are about the thickness of a paperclip, and hairy.

The first batch started to germinate after about 10 days and I got 30% germination. I have since read that because of their built-in growth inhibitors (a lot of seeds have this) germination can take anywhere from five to fifty days. So 30% may not be accurate, but it's what I got. I now have 9 plants from that first batch.
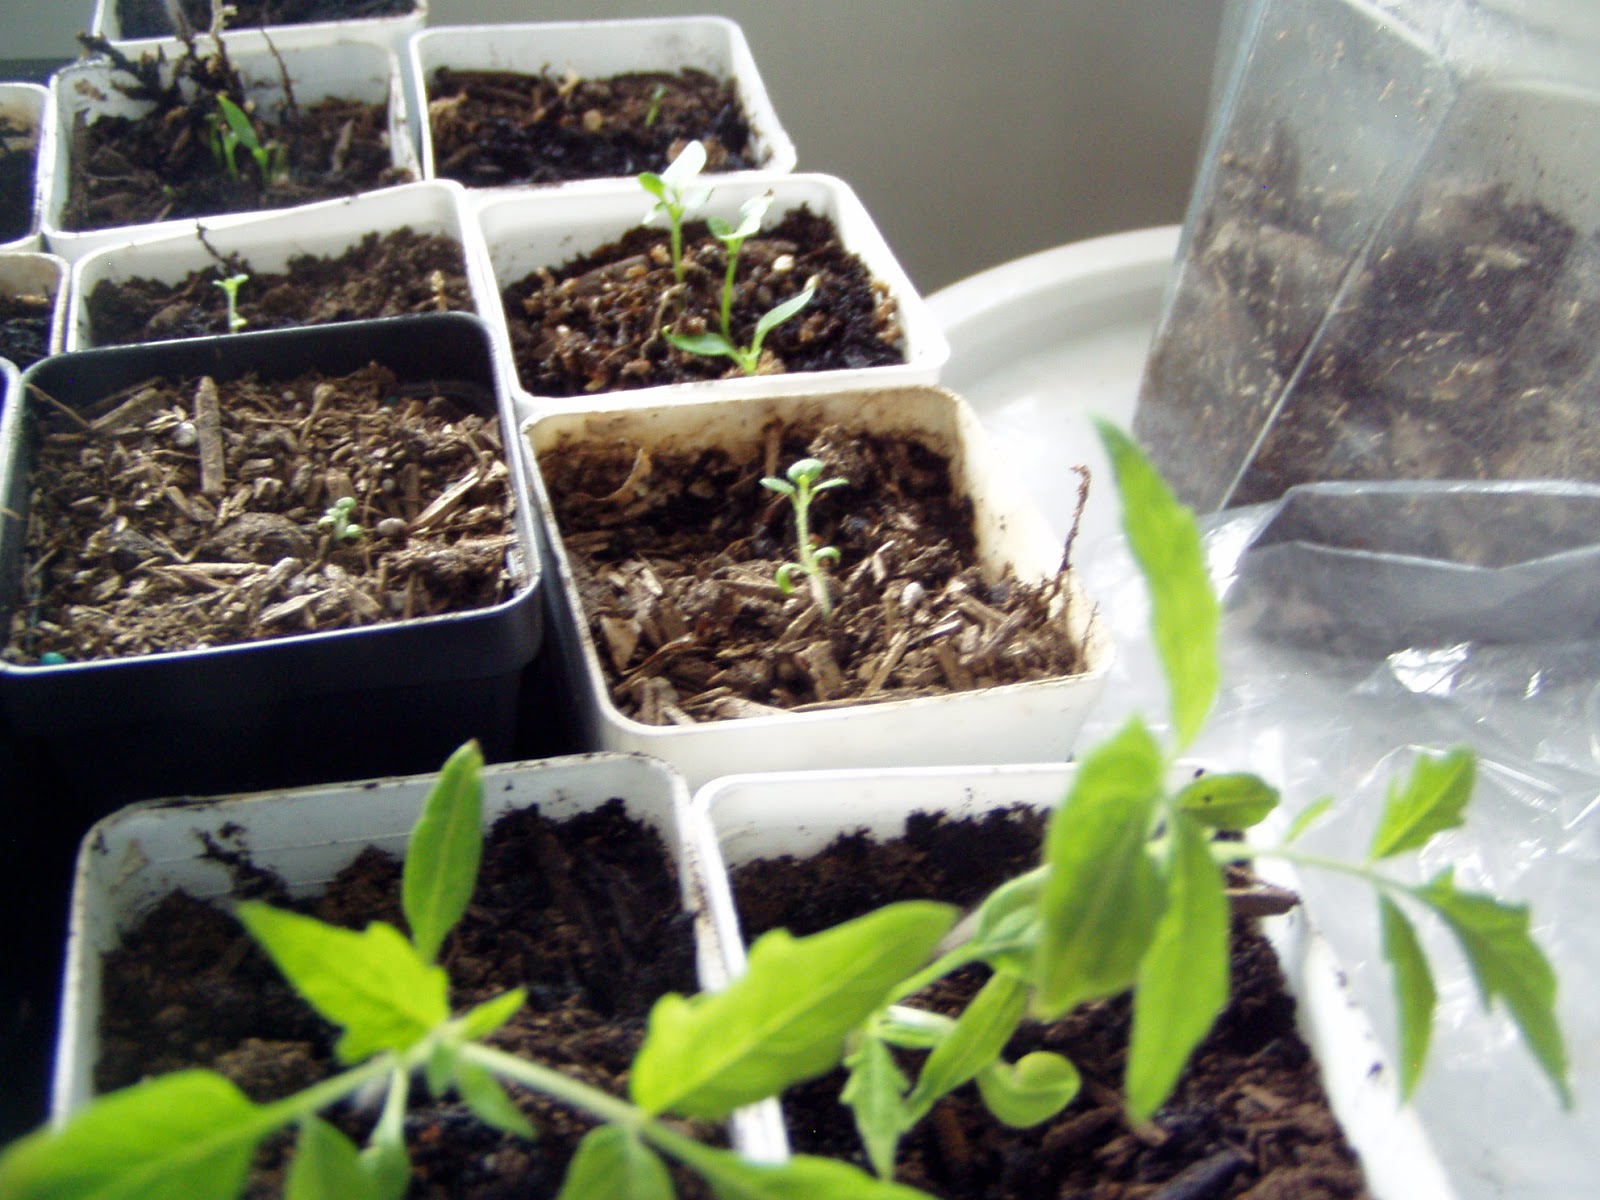
The potato seedling is shown here (in the center) with tomatoes below and peppers above, all of them planted the same day. If you look really close you can see two more potato seedlings, just two leaves poking up above the soil in the two pots that look empty. This was the day after transplant into their first pots.
I'm half expecting a high failure rate this year. I hope not, but working with plants when I'm not familiar with their habits and needs gets tricky.
Monday, February 27, 2017
It's not "Traditional"
It snowed last night and the sky is overcast. Not unexpected for February. Last night I was chortling over the new snow, but this morning I want to go out and play in the dirt, and it's all covered with sky dandruff! :)
It's interesting how habits affect people. I was talking about the garden the other day and the man I was talking to asked how I was going to till 18 inches of mulch into the soil. I said I wasn't going to till and started to explain, but I got as far as "no-till" and he said "Maybe that's why you're not getting a crop. The soil needs to be tilled or nothing will grow."
We get a good crop every year (aside from corn, which is another topic altogether) but that doesn't seem to matter. If we're not tilling, we're not getting a crop. Habits.
Tilling has been a staple of gardening and/or farming for generations. It allowed for "commercial" farming rather than a group of people walking through the fields poking holes in the dirt. It allowed an easily harvestable crop, in straight rows, so it was more economically feasible, and over time it became an inflexible rule--no till, no crop.
It's not precisely true. Or not at all true, depending on your point of view. Tilling breaks up the soil, allows water to escape, allows air into deep soil where it would not normally be and jumpstarts the bacterial process that releases a short-lived nutrient payload into the soil. There's a lot of science surrounding the issue, but tilling is traditional and speaking against it is Badthink.
Then there's monocropping--planting a single type of plant in blocks, in straight rows. Again, a carryover from commercial farming.
Another long-lived gardening "habit" is leaving the space around trees open, the soil uncovered to prevent rot, disease, and keep rodents and bugs away. But nature doesn't work that way. The leaves fall, surround the tree, form an extra layer of winter protection, keep water IN the soil, prevent bugs and provide (through compost) an extra influx of nutrients every year. It's really not rocket science. And yet I talk to people all the time who are of the "bare dirt" philosophy.
I normally just smile and keep my mouth shut. The bare-dirt philosophy started because commercial farmers needed clear space under their trees for harvest and care of the trees. Over time it hardened into an inflexible rule. If you allow anything to fall or grow under your trees your trees will die.
Traditions and habits can be a good thing. They teach the basics, prevent many problems, and otherwise form a framework for a life. But as adults we need to THINK beyond the traditions. Honestly, with most things I end up going with the habits or traditions, but it's because I've identified the issue, thought it through, and decided that the habit or tradition is the best way to go.
Blind adherence is not my way. But if I try something new in my garden and find out it doesn't work I'm willing to go back to the traditional. Or at least to consider it. :)
Sunday, February 19, 2017
Best laid plans
My process for everything = as little effort as possible and no outside resources that might not be available at some point. That includes electricity, which makes people look at me oddly and wonder about my sanity. To which I can only reply that if they knew me they wouldn't have to wonder.
I look through gardening catalogs and I see special starting trays, heat mats, specialized starting medium, even coated seeds so they germinate more easily and predictably. The gardener's perfect setup to ensure success every time! My own "setup" consists of a covered cake tray, toilet paper rolls and sphegnum moss. Whoop-de-doo. Severely high-tech, do NOT try this at home. :)
I cut the toilet paper rolls in half, stuff them with moss, put them inside the cake tray, hydrate the whole thing, plant the seeds and done. Well not technically DONE, but done with that piece. In a sunny southern window the seeds get plenty of heat--sometimes too much.
But someday, those resources may not be available and I want my plants to survive and continue to feed me. With that in mind, I want strong, self-sufficient monsters that are going to survive no matter what is thrown at them, and that won't happen if I coddle them with all the stuff that people seem to think is necessary. So when a seedling starts to sag from damping off, I pull it. If one comes up with no seed leaves, I pull it. I don't spend time and resources on trying to save something that will just pass on weakened genes to the next generation.
Up to this point I haven't taken this beyond seedlings, but this year will be different--if I can make myself pull perfectly healthy plants just because they get a virus or a calcium deficiency. I don't want those weaknesses in my seeds. If there is no fertilizer I don't want plants that have grown into that dependency over a matter of generations.
So starting this year I'm going to be ruthless. I hope. At least that's the plan.
Sunday, February 12, 2017
Seedling update
True potato seeds (TPS) had about a 30% germination rate, which is fine because I only want the strongest plants to put outside. I'll be doing the next batch with brighter lights to see how that affects it. I was initially told to use supplemental lighting and bottom heat but I don't really have any way to do bottom heat without electricity so that's a no. Once this set is well established I'll be doing at least one more this year, then save the rest of the seeds.
Tomatoes had an excellent germination rate, which they usually do--all my own self-harvested seeds. Three of the pots had only one plant come up, but several had 3 so we ended up with 30 strong plants. I planted 32. One damped off so I pulled it. Only the strongest are going in the ground this year, and I've half decided (well, 3/4 decided) to pull any that have blossom end rot.
Last years peppers were a wash. Only a few came up and they didn't have seed leaves. I ended up with one after planting about 30. I assumed something was wrong with the seeds so this year I just pretty much dumped the seeds--anywhere between three and ten in each pot. It looks like most came up. I have 18 for sure, possibly another 10 or 12 coming.
Celery was a wash. Not a single seedling. I'm going to replant with brighter lights and see if that helps.
One licorice plant sprouted. I planted additional seeds to see if we can get more. Ideally one for each fruit tree (as nitrogen fixers), but if we can get one established we're home free.
No sign of fruit tree seedlings yet, but I don't expect that until later. Possibly as late as May.
One goumi survived the winter.
Last night's frost melted off in minutes. Another month before I can safely (!) plant out the tomatoes with protection. I did it last year in February and they thrived, but the other plants caught up and they didn't fruit any sooner so the extra work and care isn't worth it.
Wednesday, February 1, 2017
Projects
As spring gets closer I start dancing anxiously, wanting to be out there playing in the dirt. I look out my window and I see the grapevines that need to be trimmed, the trees that need to be pruned, my garden area (now covered with a six inch layer of leaves for mulch!) and my fledgling forest garden.
The forest garden was last year's major project. Everything up there will be perennials or self-seeding annuals, and I mulched it heavily this year so hopefully I won't need to water as much. The tree I have right now is a rescued apricot. I need two dwarf cherry trees to finish the "canopy" layer, but for the understory I have akebia, gooseberry, currants and aronia. Akebia is a vine, which eventually will create a windbreak for the strong winter winds. I also have edible honeysuckle that I grew last year, but I don't know if it survived the winter. At groundlevel I planted potatoes, herbs, strawberries, horseradish and kale along with various scattered annual seeds. This year I'll leave it mostly alone so the plants can fight out their own balance and naturalize wherever they fit best.
As I said, last year I covered the gardens with a thick layer of leaves for mulch. The plan is to use the fall leaves from the trees to cover whatever area is lying fallow the following year, giving the leaves a year and two winters to compost. If there are sufficient leaves (or I can get enough) I'll finish a new garden area each year. Every area of the garden will get a thick layer of mulch at least every seven to ten years rather than a scattering of leaves every year.
I have two major projects planned for this year. The first is the greenhouse. The roof will be a watershed, directing the water from runoff into the forest garden. During the summer it will be covered with vines for temperature control and it will sit flat against a block wall for heat in the winter. A combination of geothermal and sun. It will have a door on either side to allow the winds to blow directly through for another layer of temperature control.
The second major project is removing a bunch of grass and planting fruiting berries and herbs as a border around the yard. We plan to raise the ground level around the edge by about 18 inches, which will necessitate moving the sprinklers in and up as soon as the ground thaws enough. The flattening of the ground will prevent much of the runoff we currently experience and the rainspout from the roof will feed into this area as an additional water source. Since the plants I'm considering are drought tolerant or local natives (Serviceberry, lavender, etc), it shouldn't ever need supplemental water.
My minor projects are growing potatoes from true potato seed (TPS) and grafting fruit-trees onto serviceberry root-stock.
I'm anxious to get started, but the ground is still covered with white sky-dandruff. :)
Monday, January 23, 2017
Fluke is not a fish :)
Interesting coincidence (fluke) or whatever, I was just reading back through old posts and discovered that every year about the middle of January I start getting Spring fever. Or itchy feet, cabin fever, whatever you call it. I start planting, going outside, digging in the snow, demanding that spring come NOWNOWNOW! Buying seeds. Or trees. Oops.
I have so many plans! I want spring to come so I can get started, but mostly I want spring to come because I can plant my feet in the dirt and give a huge sigh that I'm back where I belong.
I have so many plans! I want spring to come so I can get started, but mostly I want spring to come because I can plant my feet in the dirt and give a huge sigh that I'm back where I belong.
Wednesday, January 18, 2017
Beans
This year, just as a test, I decided to grow dry beans inside. It wasn't a rousing success--only three plants came up and only three pods off of two of the plants. No big deal, I wasn't expecting much. The two kinds of beans I planted were Great Northern White and Pinto. The pods all looked the same, so I assumed I had only one kind of bean and I was anxious to see what I got.
However, I just pulled a mostly dry pod off one of the plants and opened it up.
What I have are the color and shape of the Great Northern White, but with the markings of the pinto. I know it's just a fluke--what I probably got are pinto--but it's interesting.
However, I just pulled a mostly dry pod off one of the plants and opened it up.
What I have are the color and shape of the Great Northern White, but with the markings of the pinto. I know it's just a fluke--what I probably got are pinto--but it's interesting.
Monday, January 9, 2017
Using wild yeast for bread
Using wild yeast isn't as simple as capturing it. Maybe it doesn't like being imprisoned. Who knows?
Initial post on capturing wild yeast here.
Each variety of yeast has its own personality and its own needs. I made yeast from four different kinds of fruit--apple, orange, plum and raisin. The initial "feeding" was done with flour I'd milled myself, and I'd grown the wheat. On that one, apple and raisin did the best with apple ahead. Plum just sat there, sulking. Orange raised, but wasn't outstanding. When I did the second feeding I used white flour since I ran out of the other.
Raisin went crazy, doubling in size in less than six hours. Apple sulked at the change in diet and orange just tagged along, riding on the others' laurels. Plum was still sulking from the first offense. I immediately used the raisin to make a small batch of bread, and fed it again.
I had the original liquid left over, and since orange and apple showed no sign of fungus I dumped the leftover fruit and made another starter for those two "flavors" of yeast.
Here comes the tricky part. I hadn't measured the water precisely, but the original was about the same amount for each. When I added flour and water for the starter I measured it, putting in 1/4 c of flour and 1/4 c of water each time. So theoretically they all had the same amount of water to start, within a teaspoon or two. When I put the starter liquid in the starter jars, I measured it at 8 ml (almost two teaspoons) for each jar.
I used half a cup of starter with my "raisin yeast" bread loaf. I cut the recipe in half so I used 1 1/2 c of flour and 1/2 c of water since the starter was liquid as well. The dough was dense, dry, and resisted kneading. I added water a little at a time until it was the right consistency, and let it rise overnight.
I decided to get rid of the "plum" starter, since it wasn't doing anything, so I added 1 1/2 cups of flour and 1/2 cup of water...it soaked up the water and was messy-sticky. I had to add flour.
Then the apple starter and the orange starter from the original bottles. The orange starter came out in a lump, the apple starter came out soggy, with lots of water in it. So I added 1 1/2 c of flour to the apple starter, and added both flour and water to the orange starter. The orange came out perfect, the apple needed slightly more flour.
The only real difference between them all was the yeast culture--precisely the same amount of culture, the same amounts of water and flour, but the outcomes were entirely different.
The raisin loaf is dense, with a soft crumb and a crunchy crust. Because of the wheat flour used in the original feeding it has a wheat flavor. The wild yeast didn't seem to make a significant difference to the taste. But the smell! Oh, my. I would bake every day just for that smell!
The plum loaf was definitely sourdough, but with a faint fruity taste that doesn't linger. The crumb is light but dense.
The orange loaf was dark and crunchy, with a flavor that's difficult to describe. It smelled really sour going into the oven, but coming out the taste wasn't even sourdough but completely different. The texture is almost like a cake rather than bread, but not dense--just a little stiffer than I'm used to bread being. Almost like focaccia.
The apple loaf is very light in color and has a very mild sourdough flavor, but again it's different from any sourdough I've had before. The smell is fruity but there's none of the fruit flavor. It isn't dense, but the crumb is strong and resists tearing. The crust is extremely chewy.
I could get addicted to having bread that has a different flavor every time I bake.
Based on this test, the rankings of the 4 types of yeast are:
1 Raisin
2 Apple
3 Orange
4 Plum
Monday, January 2, 2017
Yeast
I've always thought that yeast is boring. I mean, you take it out of a bag--boring. It's a uniform color and it makes bread rise. It's also a finite commodity--in an emergency, once it's gone, it's gone. But there's yeast in the air all around us. I've investigated capturing wild yeast but it's a long drawn out process and takes lots of resources--if you're baking bread every few days great, but if you get a strong culture it grows so fast that anyone else can't use it all and it dies. Or you keep feeding it and use all your flour just keeping the thing alive.
Then I ran across a mention of using fruit yeast. The white bloom on grapes, plums, etc? Yeast. There's yeast on every fruit and every bark and every leaf, just waiting. If I can harvest yeast that easily, then why bother keeping a culture alive? Start a new one every month or so.
I didn't have any fresh fruit to test my hypothesis (aside from oranges) so I used raisins from last year's harvest, a dried plum from last year's harvest, a piece of dried apple from two years ago, and a piece of fresh orange peel.

After four days bubbles were starting to appear in the water, and three of the four smelled "yeasty." The plum just smelled fermented. The raisins and plum had fungus hyphae in the water.

I took 1/4 c of flour and 1/4 c of filtered water and put them in jars with about 2 teaspoons (8 ml) of liquid from each bottle.
Less than 24 hours later the dough was already rising. The strongest (most bubbly) was apple, followed by raisin, orange and plum in that order.


Plum had bubbles but hadn't started mounding yet. I fed them another 1/4 c of flour and 1/4 c of water, put them in larger bottles and put them away again. The orange had a sour orange smell, the apple just a faint hint of apple, the plum just smelled like fermented plums, and the raisin like raisins. All had a yeasty smell. At this point I had cut out a week, possibly two, from the process of collecting wild yeast.


The original bottles had lost their "yeast" smell, with the exception of the apple which had a very strong yeast smell. I assume the bacteria and fungus had taken over the other three bottles.
The orange, apple and raisin had visible rising within a few hours. Raisin more than doubled in about six hours and overflowed its bottle so I used half to start a batch of bread.

Based on the test, this process is both simpler and more predictable than trying to capture a wild strain of yeast by setting your culture out on the windowsill or under a tree. Any fruit should work--if dried fruit several years old provided an immediate result, fresh fruit would probably be better. It also isn't necessary to have a full jar of mashed fruit--less than a tablespoon of each kind resulted in usable yeast growth within a few days.
Post on baking with this yeast
Subscribe to:
Posts (Atom)