The dry garden was a qualified success. I watered between 2 weeks and 1 month apart, with the exception of a hard rainstorm in August. Approximately 1 out of 3 of the plants that came up actually flowered—the winners there appear to be zucchini and pumpkin. Only one of the butternut bloomed. Of those that flowered, apx 1 out of 3 got female blossoms and set fruit. This was pretty much expected, since most of these plants are used to a great deal of water. Those that survived and fruited will be more drought tolerant in the next generation.
Sun is much more important with the dry garden than it is with the normal garden. I planted part of the dry garden in partial shade (about 7 hours of sun per day) and only one plant fruited. Blossoms came on a month later than the “sun” dry garden, although the shade dry garden went longer between waterings as well.
I planted zucchini, butternut squash, pumpkins and spaghetti squash. Zucchini was the hands-down winner, probably due to already being acclimated to this area. Most of the zucchini plants came up, and all blossomed, although only one is actively fruiting to this point. I seem to get fruit in “flushes,” apparently based on the watering schedule. When I watered, within a day or two female blossoms popped out, between four and six blossoms each time. This did not happen with the pumpkin or butternut.
The zucchini ripen more quickly and smaller, and the patterns are slightly off from the expected for the variety.
Squash may be a plant better suited to an area with a longer growing period for dry gardening, although I did get a late start. I'll try squash again next year, but in a different area, and protect the seedlings more than I did this year.
The watermelons got "dry" farmed in a sense as well, as the area they're in got watered only once every ten days. They thrived, doing much better under their mulch than the watermelons in the main garden without mulch. The specifically drought tolerant watermelon was actually getting too much water and really struggled until I pulled the watering back to every ten days. I think it will do even better next year, when it's every two weeks.
I think as my soil improves "dry" farming will become a more viable option.
Thursday, October 4, 2018
Sunday, September 30, 2018
Watermelon landrace update
The watermelon landrace project actually got more interesting as the summer progressed. As the plants started to bloom I discovered that three of them (two landrace and one Hopi Red) were producing perfect flowers. A perfect flower is a flower which contains both male and female parts. It's capable of self pollinating, without the assistance of bees. I have never seen this before on squash or melons.

I wasn't able to find anything about this possibility online, which made me more excited. The idea of a self-pollinating melon had me bouncing off the walls. Since three plants had the same trait, I thought, maybe it's something to do with my soil? With the help of a friend (Joseph Lofthouse) I learned that this is relatively normal for watermelons, which dimmed my enthusiasm not at all but simply turned it in another direction.
If it wasn't in the soil, but inherent in the plant, I can breed for it. Hehehehe.
Most of the watermelons ripening from the landrace plants are icebox size, which isn't what I wanted. I made a mistake last year and bred in the Sugar Baby watermelon, which is slow growing and produces small melons. It appears that the majority of the plants that survived have Sugar Baby ancestry, but I'm trying for medium to large so I need to avoid taking seeds from any of these. Another interesting thing is that many of the melons currently ripening are misshapen, which I've also never seen before. This may be due to under pollination, but the fact that ONLY the landrace plants are doing it suggests that there's some oddity to the way the genes are combining.
Of the surviving plants, 2 have not bloomed at all. This was rather expected, as I deliberately planted in an area with poor soil and little water in order to select for the strongest. Another has produced only male blossoms. Two of my landrace plants have large melons. One of the two had four flowers pollinate, although two aborted later. It was also one of those with perfect flowers. This will be the primary female parent for this year. One of the two remaining melons was pollinated by hand and should include genes from Hopi Red, my landrace (Ali Baba + either traditional or Sugar Baby), and Joseph Lofthouse Landrace.
Most of the surviving landrace plants took after the female parent in shape and color, but after the male parent in size. All but one had the pale green skin of the Ali Baba watermelon and the seed structure of the Ali Baba, but with varying sizes and shapes consistent with the plants used as pollinators last year. The plants also took after the pollen donor, those with the icebox size melons growing much slower on a less robust plant.
All pollinated flowers follow the same general growth pattern, the watermelon being around 3 inches long twenty days after pollination, 6 inches long after thirty days and 9 inches long after 40 days. The watermelon stops growing when it's close to its adult size and gains that last half inch or inch through the rest of its growing period. By the time it reaches its adult size some seeds have already matured. Extending this tendency out, it is likely that any watermelon can mature relatively quickly once it reaches its mature size depending on environmental factors. Removal of water, not enough sun, a cold snap, may all trigger the melon to full maturity quicker than it would normally go. I'll have to test for this in the future and see if it bears out in real life, but based on my observations it's a real possibility.
Next year the primary female parent will be either my "traditional" watermelon or the Jubilee, introducing one more line into the mix. In 2020 or 2021 the lines will start to stabilize and I should start to see the results of the mixing. That's when the real fun begins, choosing for the traits I want.
I started this particular landrace for a couple reasons. I wanted to learn the principles before I started on any of the major food crops, and I had seeds for several different varieties of heirloom melons.
I am desperately concerned about food security. The majority of the population has no idea where their food comes from or how it gets to them. They're perfectly satisfied that THIS WEEK the grocery store has what they need. With more and more farmland being sold off because of taxes and other economic problems, we rely to a large extent on food produced in other areas and trucked in. Often from other countries.
When (not if) that supply chain stops, we must be able to provide for ourselves. In order to do that we must be able to grow the maximum amount in local conditions, and we can't do that with seeds sourced from the Oregon coast or Arkansas. Even seeds from other desert or semi-desert areas wouldn't precisely fit our environment. They have to be produced here, grown here, without fertilizers or soil additives, and to the extent possible without additional water.
The simplest way to do that, and to make sure that those plants will be able to adapt when conditions change, is a local landrace.
Friday, September 21, 2018
Bean Notes (ongoing, will add to this in subsequent years)
2019
Hidatsu red--resurrected. Apparently two beans matured and I wasn't aware. They came up this spring and were my largest producer.
Rattlesnake--great grower, not a good producer. I'll include it on a limited basis with the climbing bean landrace
Tepary--great grower in the dry garden but just starting to produce end of September. If I get any beans they'll be my first generation, but at this point it doesn't look likely. Try again next year.
Scarlett Runner--growing OK but just started blooming beginning of September. No beans before the first deep freeze. Only two of the 12 plants even germinated.
2018
I've been trying to work with dry beans for a couple years now. Unfortunately, real life information isn't available for many of the varieties I have, so here goes.
The failures first, taking into consideration that I plant sporadically, sometimes early and sometimes late, in different areas. But I don't eliminate a bean entirely until it's been grown on my property for at least two years in different circumstances.
Calypso--eliminated. A black and white bean, probably bred for appearance rather than production. In my garden only one or two beans per pod, many of them empty, and while there were a lot of pods on the plant, that makes harvest a serious problem. Not too productive in terms of real numbers.
Hidatsu Red--eliminated. Planted by the corn last year and failed to produce. Planted by the bean towers this year and also failed to produce. Right now, in mid September, the first beans are just starting to come on. Chances are good that nothing will ripen before the first frost. NO seeds last year, NO seeds this year, end of experiment.
Hidatsu Shield--Ditto.
Whipple--First year planting these. One plant survived. Supposed to be 70 days, but just starting to produce after over 100 days. I'm guessing they need a little stress in order to ripen. I removed the water and got my first ripe beans a week later.
Monos Negros--First year planting these. One plant survived, a good crop.
Oland Brown--First year planting these. One plant survived, a good crop.
Kidney--Fabulous. Planted these last year with 100% mortality. This year one plant survived, and got more off that one plant than from any of the others so far. It ripened quickly, fully finished by mid-August.
Pinto--Good producer. It did OK last year as a climbing bean but produced little. This year I used last year's seeds and it did well for those plants that survived. From the three plants I already have more than I harvested last year total.
Tepary--Two varieties. Neither has produced this year. The blossoms are just starting to come on. They're supposed to be highly drought tolerant so I don't know whether they're getting too much water, too little, wrong soil, not enough sun, etc. I can't find any information on how these are supposed to grow.
Blue Lake--First year with these. A green bean, seeds out of a box. Good production, good seed production.
Rattlesnake--first year with these. They ran rampant over the corn and strangled it. Good production, but they'll be on the bean towers next year rather than by the corn. This is also supposed to be drought tolerant.
Tendergreen--first year with these, and they produced well. Good seed production as well. Low germination, but that's normal for my yard with seeds I didn't grow.
Black Turtle--3rd year. First two years they produced OK, so this year I thought I would do them as a main crop. Chose the wrong area, with only half a day of sun, lots of bugs, and bad soil. Will try again.
Idaho Pink--Established. This was supposed to be the second half of my main crop. See Black Turtle notes.
Great Northern White--Established, didn't grow it this year. An OK producer, half-runner. Many of the plants had just a few beans in each pod, so I took my seeds from the full pods.
Scarlet Runner--I was just given seeds this year so I have nothing yet. These will be planted the first time next spring
Tiny mystery bean--Foraged from the same area as the Scarlet Runner. I have no idea what these are. The beans are tiny and brown, the pods probably 8 inches long. These will be tested next spring.
Sunday, September 2, 2018
Is my watermelon ripe?
Figuring out when a watermelon is ripe (i.e., ready to pick) isn't rocket science. See the curlique at the base? In this picture it's green (unripe). When it dries up, the watermelon is ripe.

If the curlique is dry or mostly dry, thump the watermelon. If it sounds hollow, it's ripe. Thump a couple in the area to see if you can tell the difference.
Look at the bottom. The color should be (note the qualifier "should") gold or yellow. This one isn't as absolute as the others, as I've eaten fully ripe watermelons that were still white on the bottom. Different breeds have different habits.
The problem comes in when you're picking one from the grocery store. The curlique got left behind when it was picked, it was probably picked at the same time as all the other melons without concern for peak ripeness, it's probably been bred for storage life rather than taste, etc. At that point, the thumping is the best option, but it takes practice to tell a ripe watermelon from unripe.
Friday, August 31, 2018
Parkstrip update
I've been watering the parkstrips every ten days. Since it sometimes catches overflow from the lawn certain areas are getting more water. I'm trying to eliminate that. The parkstrips are doing quite well, and even the sweet potato is thriving. Next year I'm hoping to drop the watering to once every two weeks.
Sunchokes before and after (the after picture has watermelon in the foreground)


Sweet potato before and after


Iris/echinacea before and after with borage and watermelon


Parkstrip Video 2018
Sunchokes before and after (the after picture has watermelon in the foreground)


Sweet potato before and after


Iris/echinacea before and after with borage and watermelon


Parkstrip Video 2018
Wednesday, August 8, 2018
Dry Farming update
This year I’ve been working on a number of projects, but because we live in a desert the water takes precedence.
One project that I was able to start this year is a dry garden.
Dry gardening (or dry farming) is the practice of planting and growing without water. Technically in order to be considered “dry” farming, the area has to get less than 20 inches of rain per year and the farmer doesn’t use supplemental irrigation.
Many areas considered “dry farming” areas leverage mild winters to plant winter crops, such as wheat, then let the land sit during the dry summer. Others plant in the summer but use mulch (often dust mulch), wide spacing, alternate year planting and other procedures to get a crop where none would otherwise grow.
I decided that for the purpose of this test I would water no more than twice a month, so it’s not technically dry by definition, but considering that the main garden gets watered every other day (more or less) every two weeks is a huge improvement.
Tucked between our house and the neighbor’s fence is a strip of dirt about six feet wide and 20 feet long. Nothing grows there, it’s in shade after about 3, it has grapevines on one side and the house on the other. The water source is our 275 gallon water tanks that collect water from the roof. The soil is sand and rock.
Call it a personal idiot-cyncracy, but I don’t like seeing dirt (not soil in this case) going unused. Since in many areas grapes aren’t watered at all, I figured it was both a good test for them and a good place to put a dry garden.
It gets about seven hours of sun. Last summer I dug down into it sometime in July and it was bone dry at least a foot down. Last fall I mulched it deeply, and this spring I planted through the mulch.
The bugs had a heyday, and all but one of the seedlings perished.

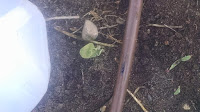
I planted again on 6/11, this time under cover. Milk jugs are incredibly versatile.

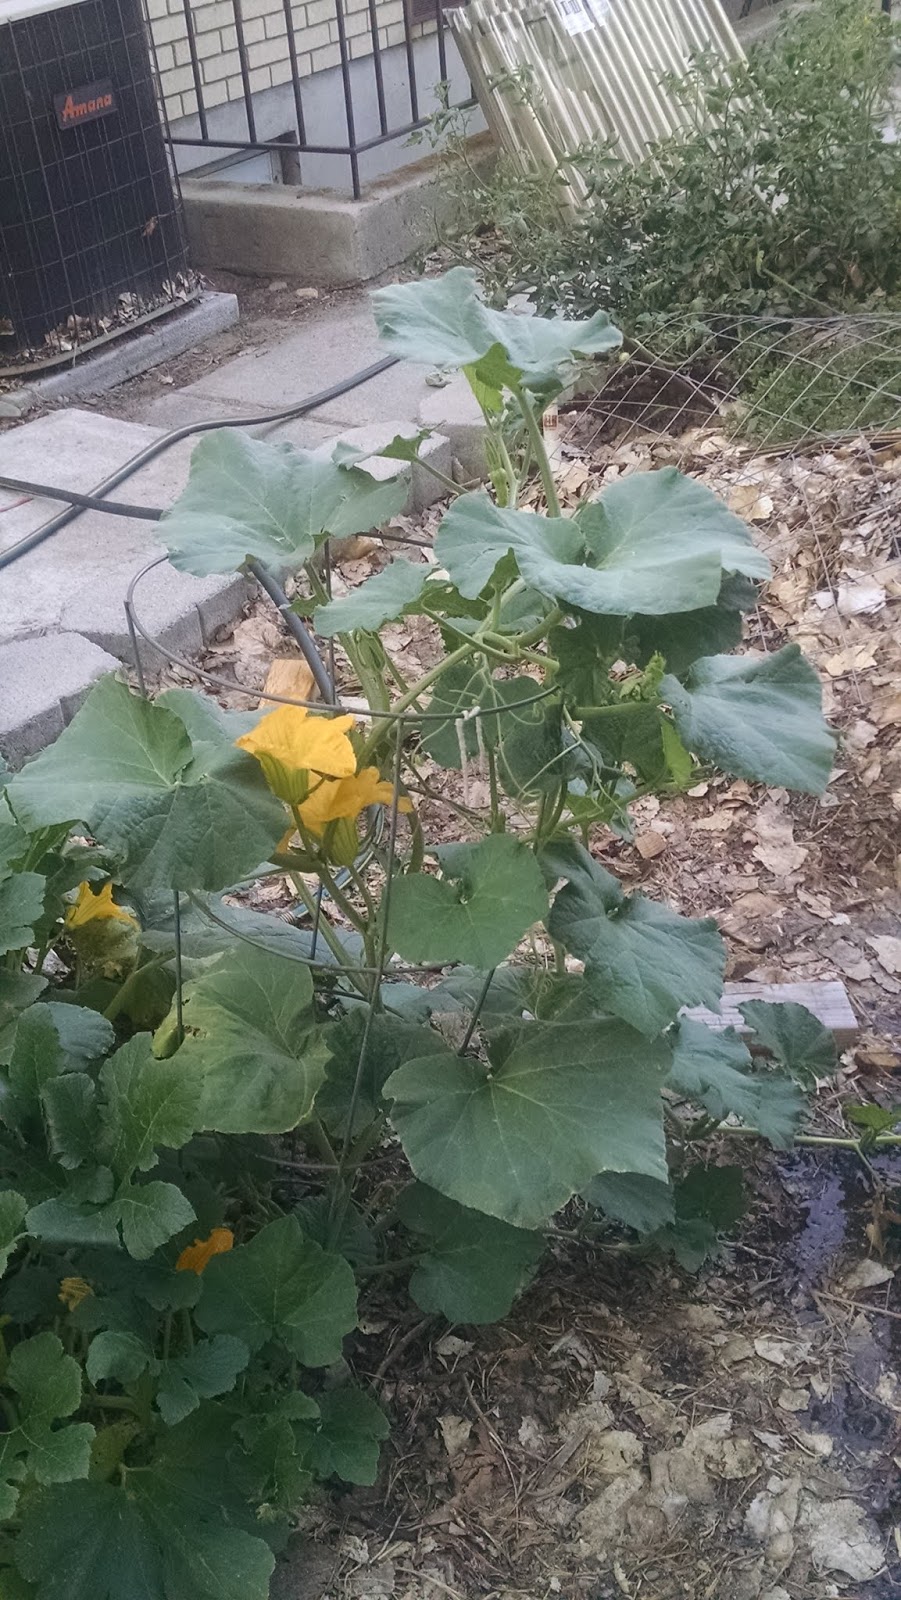
That same day I also planted a single zucchini plant / butternut combination in an area with the same circumstances but in full sun. Deeply mulched, same soil. I gave each seed 2 gallons of water.
On the same day that the picture above was taken, one month after planting...

It had no additional water—the only difference was the sun. That’s a castle block in the bottom corner, about 11 inches wide.
The dry garden was replanted on 6/11. The sun version was watered on 7/1 but probably could have gone longer. The shade version was watered for the first time on 7/9. They were all watered on 7/24 because I decided (erroneously, I now believe) that I should stick to the same watering schedule for both.
So the sun version was watered on 8/8. Today, we have this.

And this...

And then we have all the other plants in the dry garden. At least the grapes are thriving.

The one in the middle is another zucchini, of the same variety as the other.
The sun made a much larger difference than I expected. The sun garden needs to be protected during the worst of the afternoon heat, but the butternut has male blossoms and the zucchini is bearing, so the little bit of extra work is worth it.
Watering every two weeks is probably too much if you have good soil. My soil is sand and rock but I could probably still stretch it to once a month if necessary. The true test will be next year, when I use the seeds I get this year and stretch the watering schedule to once a month.
I figure if they survive and fruit under these conditions they’ll be better adapted in the next generation. The ideal would be to find varieties that are already adapted to drought conditions (massive root systems, primarily) and start from there.
I never could do anything the easy way.
The first update
The second update
Original post on Dry Farming
One project that I was able to start this year is a dry garden.
Dry gardening (or dry farming) is the practice of planting and growing without water. Technically in order to be considered “dry” farming, the area has to get less than 20 inches of rain per year and the farmer doesn’t use supplemental irrigation.
Many areas considered “dry farming” areas leverage mild winters to plant winter crops, such as wheat, then let the land sit during the dry summer. Others plant in the summer but use mulch (often dust mulch), wide spacing, alternate year planting and other procedures to get a crop where none would otherwise grow.
I decided that for the purpose of this test I would water no more than twice a month, so it’s not technically dry by definition, but considering that the main garden gets watered every other day (more or less) every two weeks is a huge improvement.
Tucked between our house and the neighbor’s fence is a strip of dirt about six feet wide and 20 feet long. Nothing grows there, it’s in shade after about 3, it has grapevines on one side and the house on the other. The water source is our 275 gallon water tanks that collect water from the roof. The soil is sand and rock.
Call it a personal idiot-cyncracy, but I don’t like seeing dirt (not soil in this case) going unused. Since in many areas grapes aren’t watered at all, I figured it was both a good test for them and a good place to put a dry garden.
It gets about seven hours of sun. Last summer I dug down into it sometime in July and it was bone dry at least a foot down. Last fall I mulched it deeply, and this spring I planted through the mulch.
The bugs had a heyday, and all but one of the seedlings perished.

I planted again on 6/11, this time under cover. Milk jugs are incredibly versatile.

That same day I also planted a single zucchini plant / butternut combination in an area with the same circumstances but in full sun. Deeply mulched, same soil. I gave each seed 2 gallons of water.
On the same day that the picture above was taken, one month after planting...

It had no additional water—the only difference was the sun. That’s a castle block in the bottom corner, about 11 inches wide.
The dry garden was replanted on 6/11. The sun version was watered on 7/1 but probably could have gone longer. The shade version was watered for the first time on 7/9. They were all watered on 7/24 because I decided (erroneously, I now believe) that I should stick to the same watering schedule for both.
So the sun version was watered on 8/8. Today, we have this.

And this...
And then we have all the other plants in the dry garden. At least the grapes are thriving.

The one in the middle is another zucchini, of the same variety as the other.
The sun made a much larger difference than I expected. The sun garden needs to be protected during the worst of the afternoon heat, but the butternut has male blossoms and the zucchini is bearing, so the little bit of extra work is worth it.
Watering every two weeks is probably too much if you have good soil. My soil is sand and rock but I could probably still stretch it to once a month if necessary. The true test will be next year, when I use the seeds I get this year and stretch the watering schedule to once a month.
I figure if they survive and fruit under these conditions they’ll be better adapted in the next generation. The ideal would be to find varieties that are already adapted to drought conditions (massive root systems, primarily) and start from there.
I never could do anything the easy way.
The first update
The second update
Original post on Dry Farming
Monday, June 18, 2018
Park Strip Conversion Project Update
This spring I started a new project--it's been planned for a while, but this year I asked a bunch of friends to come help me. We pulled all the grass out of the parkstrips. I was able to get a chipdrop a few days later and filled the space with wood chips. Then I spent a couple weeks transplanting drought tolerant plants from other areas of the yard.
When it fills in it will be AMAZING, and in the meantime I'm not paying the city to water "their" grass three times a week. The park strips abut my property but are technically owned by the city--however, the adjacent land owner is responsible for maintenance. Grass takes a LOT of water, so I decided to take care of the problem.
I now have echinacea, groundcovers, irises, tarragon and a bunch of other drought tolerant or borderline xeric plants in there.


The rocks create a little bit of a protected zone, where the sun doesn't hit the soil directly and the water doesn't evaporate as fast.
This week I planted a sweet potato. I'm not sure if it will survive, but I figured it's worth a try.

This morning I noticed something interesting. It's wet enough out there, even in full sun, that fungus has started to grow. This was a dog vomit fungus, which is technically a slime mold and not a fungus, but it normally grows in shade and in very wet areas. What is this doing in a bed that was supposed to be dry???! In full sun, no less.
I've been watering this area for five minutes once a week and everything has been thriving even in full sun and with the summer heat (Mid to high nineties during the day)--except a few items that can't stand wet feet. They've mostly died. That should have told me what was going on.
I dug down in the soil and it's wet for a good six inches down. Probably more, but that's as far as I dug. I'm extending the watering schedule out to 9 days--I think we'd be good to go to two or even three weeks, but I want to do this gradually and let the plants get used to the change.
Sunday, June 17, 2018
Watermelon update
I pulled two more watermelon seedlings today. They were starting to look yellow and wilty and they were the smallest of the remaining fifteen. I am going to try to transplant them to another area and see what happens, but they do not belong in my breeding program.

The roots were still tiny, even after being in the ground for more than a month.
I am now down to thirteen of my first generation hybrids. I may get it down to five, but I doubt it. Eleven of the remaining thirteen are looking pretty healthy, although only three are starting to sprawl.

The roots were still tiny, even after being in the ground for more than a month.
I am now down to thirteen of my first generation hybrids. I may get it down to five, but I doubt it. Eleven of the remaining thirteen are looking pretty healthy, although only three are starting to sprawl.
Friday, June 15, 2018
Dry Farming update
A month since I posted last about my dry-farming test.
As a refresher, I planted three kinds of seeds and then left them alone. They were planted under a thick layer of mulch in poor soil. I put them in an area with afternoon shade so they're protected from the worst of the heat.
The insects loved the buffet I put out for them. Of the seventeen plants that came up, only one survived. Once I realized the problem I tried to protect those that remained, but only one was able to recover. Lesson learned: put out bait or otherwise protect the seedlings until they're big enough to survive insect onslaught. In a dry environment insects will go after anything "wet," and in this case that's the seedlings.
A week or so ago I replanted, digging small pits to hold the seeds and setting topped milk bottles in the holes surrounded by soil to keep the insects out. So far six have sprouted, including one that came up from the original seeds. With the one remaining from the original planting we have a total of seven. I am expecting that more will come up in the next few weeks. Several are already getting their secondary leaves. I intend to leave them covered until they fill up the covers.
The next watering is planned for 7/1, since I watered the new plantings when I put the seeds in. I will only water if the soil appears to need it or the plants are seriously struggling. If the soil still appears wet at that time I will plan to water on 7/15, and so on.
The goal is to water twice a month at the most, hoping that I won't have to water at all (unlikely as that might be).
The first update
The second update
Original post on Dry Farming
Watermelon Landrace Update
On May 15th I planted the watermelon patch. Since I'm doing a landrace I planted the pollinators (Congo, Joseph Lofthouse Landrace and Hopi Red) on three corners of the patch. Those were started in the greenhouse. The Hopi Red and JLL were immediately eaten by insects, the Congo had no problems so it is considerably further along than the rest.

On the same day I planted 25 watermelon seeds from last year's crosses.
At this point (6/15) there are 15 left. Others failed to thrive (2) or were entirely eaten by insects. Several didn't come up at all.
Of the fifteen, three are obviously thriving.


Others...aren't.


Most of them are somewhere in between.
To this point I've only been removing those that were obviously dead or dying--seed leaves without any green, secondary leaves not developing. At the end of June (probably) I'll be sorting it down to five.
I'm tempted to leave more than five, although that would probably crowd them too much. These fifteen survived the sandy soil, lack of water, intermittent heat and cold, insect attack, and even being stepped on (oops). My plant-brain says they deserve to survive. The thinking brain says get rid of the weakest.
We'll see.
Watermelon Landrace
This was scheduled to be published 5/25 and it didn't happen
In short form, a landrace is a locally adapted variety of a plant, often a food plant. Up until the advent of "perfect" food requirements in grocery stores, landraces were the norm rather than the exception. Farmers would trade seeds, knowing from experience that different varieties made for stronger plants.
Over generations, much of that landrace heritage has been lost, to the point that most people believe hybrids to be bad or weak. We plant one variety of squash, one variety of tomato, one variety of beans, and then when the circumstances aren't precisely right for that plant it dies or doesn't produce. This is the plant kingdom's version of siblings marrying generation after generation after generation. Of course the genetics are going to be weak.
With humans we accept the fact that inbreeding is a problem, but in our food we want stability and perfect taste, and we breed for those things. As variations are deliberately bred out of our crops, so are the abilities that made their ancestors thrive.
I've said before and I'll say it again (probably often) that I want strong, self sufficient monster plants that will spit "not good enough" back in my face and thrive in spite of my neglect. In order to do this we need to have variety in the plant genes. There have to be ancestors that thrived in desert conditions, ancestors that resisted insect attack, ancestors that have the perfect taste we love, etc. Over time it all comes together.
Last year I started a watermelon landrace, so this year I should get a bunch of first generation hybrids. Last year I ended up with four varieties of watermelon--Jubilee, Sugar Baby, Ali Baba, and an old variety that I've been growing for years. I have no idea what the ancestry is, so I just call it Traditional.
I pollinated a bunch of flowers, but only one survived (this is normal for watermelons). It was an Ali Baba female parent, crossed with Sugar Baby and Traditional. So this year I should get Ali Baba-sugar baby crosses and traditional-Ali Baba crosses. That being the case, I will not be planting Ali Baba, Sugar Baby, or Traditional. I will be re-planting Jubilee, but only as a pollen donor.
Three new varieties will be introduced into the landrace this year; Congo, Hopi Red, and Joseph Lofthouse Landrace. Congo I already have seeds for but it got eaten by bugs last year. Hopi Red (an established landrace) is drought tolerant, and the JLL includes hundreds of different varieties.
I will watch and see which plants the bugs and snails like, which take off and thrive in my yard, which shrivel at the first hint of cold, and probably about mid-June I'll cull the landrace patch to the strongest. I'll leave the Hopi Red, Congo and JLL--they will be pollen donors only, I won't be keeping seeds from them. The seeds will be taken from the Landrace watermelons that survive.
This is the "hybrid" year, working with first generation crosses of three heirloom varieties. 2019 will be the first year we start to see the results of true variety mixing, and first generation hybrids with the new varieties from 2018. 2020 should be the turning point with my watermelon landrace, meaning the point where I'll begin to see true adaptation to my environment, my water, my soil.
Tuesday, May 22, 2018
Garden Update
This year is a little different than last because I have the greenhouse. It seems to have moderated my planting addiction to a certain extent.
About mid-April I was thinking about planting watermelon at the beginning of May and went back to my records to see if that was too soon, only to discover that last year I planted them in March. MARCH!? There's snow on the ground in March! Good grief. So no, May is not too soon.
Greens are going full bore. They are naturalized in my garden and come up every year, although I'm not sure how that's going to work with the mulching schedule. Every 7 years each area of the garden will get a thick layer of leaves. So we'll see. Lots of salad! Radishes are also naturalized in the same area, and interestingly enough where those things are growing there are no weeds.
Beans are up. Hidatsu Red and Hidatsu Shield by the bean towers, two varieties of tepary beans by the fence. The tepary beans are a trial this year, a drought tolerant type of bean from the Southwest US. I planted the green beans two days ago and the dry beans yesterday. Kidney beans will also go by the fence, as they're supposedly a climber. 60% germination on that one so far, for beans purchased from the grocery store four years ago.
Watermelons were planted out last week.
Two Joseph Lofthouse winter squash in front beside the almond, along with a mystery squash that was a gift. One cantaloupe, also a gift, seems to be doing well. I planted more cantaloupe in the same area. Three zucchini are up under the walnut. The Black Beauty Zucchini don't seem to be germinating well. I planted more zucchini and yellow squash as a border around the new garden area.
On the east of the house is an area that has been designated as the "dry" garden for this year. The plan is to water it at most once a month during the summer. It's the start of developing drought tolerant varieties and learning about dry farming. Eleven seedlings up and starting to get secondary leaves.
Friday, May 18, 2018
Dry Farming
This is my first year for a real dry farming test. Just briefly, dry farming is done in arid or semi-arid areas and does not require supplemental watering. It is considered dry farming if the farmer gets less than 20 inches of rain per year and does not use supplemental irrigation.
Not many do it anymore. Few ever did. But in a world of increasing weather tumult (hotter, colder, wetter, drier, storms more violent and frequent, etc) it seems to me that if we want to eat we need to relearn how to dry farm.
My area gets between 10 and 12 inches of rain in a normal year. Not a lot, but considerably more than some other areas. Still low enough that we're considered a desert.
I have selected several varieties of squash (pumpkin, butternut, spaghetti squash) that will be the basis of my first test. All three were planted last year in a dry area of the yard and still produced. Likely I will end up pulling out the pumpkins, as I inadvertently planted the same variety in another area. That leaves butternut and spaghetti squash, both winter squashes.
I planted six clusters of nine seeds, three seeds of each variety. I have watered them once since they were planted, and whatever comes up is my test for this year. The area is covered with leaves from last fall and will get no supplemental watering unless I do it. Two plants have come up already and I covered them to keep the birds off.
The goal is to water once a month, or less if it rains, so since it's raining today the next water schedule would be mid-June. Aside from testing the limits of dry farming, these plants are the start of my drought tolerant varieties. If I can get one fruit from each plant under those conditions, this is the 2nd year of that development.
I've said it before, but I want strong, self-sufficient monsters that will spit "not good enough" back in my face and thrive in spite of the conditions.
Original post on Dry Farming
2nd update
Friday, May 11, 2018
Spring is Sprung!
This year has been interesting, and it's barely started.
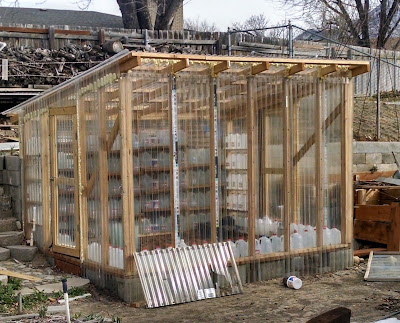
Most of the major projects are finished, now it's development time. The greenhouse, for example. This is the first summer with the greenhouse. I currently have three tomatoes, a zucchini and a few stalks of corn that will be in there all summer (I hope). The goal is to eventually have a "perennial" garden in the greenhouse that will produce 10 to 11 months of the year.
A few weeks ago I got some friends together and we pulled out the parkstrips. Grass is Gone for Good. :) They are now planted with perennials, and will be planted with drought tolerant annuals until I can propagate the larger plants needed to fill in. The goal there is to water twice a month or less, once everything is established.
All that grass is mounded up in the yard so I've been moving it a little at a time into other areas. I have a new "corner" garden on the southwest, and a new half-circle garden directly against the western (food) garden. In a year that grass will be composted and I'll be able to plant those areas.
All the main gardens have been transitioned to drip.
So lots of projects, lots of stuff going on, but the major infrastructure is complete. The only thing remaining is to remove all grass, which will be a long term process. Oh, and waiting for the trees to grow up. And getting all excited over my landraces. And rolling my eyes at the neighbors when they drive by and roll their eyes at my mess. They won't actually come talk to me, of course.
A few more weeks and the grass will be dealt with, which is the major mess right now. Just. Be. Patient.
Friday, March 16, 2018
Bokashi (In a sense)
I decided to get rid of the compost pit, for a number of reasons. First, I'm trying to go no-till, and second...rats. A compost pile is really no better, and throwing away the food garbage is counter-productive.
Food waste has to go somewhere. It goes in the garbage and into a landfill, it goes down the disposal and into the water system, or it goes into the soil. Those are really the only alternatives.
Personally I'd prefer the soil.
So I started researching alternatives. One that I ran into was Bokashi.
Bokashi is an oriental system of food waste fermentation. You can spend a fortune on special Bokashi products, but at its core it's fermentation. An anaerobic process that turns organic matter into sludge.
Some people claim that fermentation is dangerous and should be avoided. Others say composting is unnatural and dangerous. Honestly, both have their place, and I'm beginning to think that this is one where fermenting might be a better option for my family.
The standard process is to put bokashi bran (bran treated with beneficial microbes) into the bokashi bucket and put food waste in on top. Then top the food waste with more bran. Keep packing the food waste in layered with bran, and when the bin is full set it aside and start another.
The fermentation process can take up to two months, but once the process is started it can sit there and stew in its own juices forever. When fully fermented, the bokashi can be buried in the garden (not near existing plants) to finish composting. One serious advantage of fermentation over composting is that you can use meat, eggs and dairy in bokashi. Because it's an anaerobic process, the aerobic microbes that make meat stink can't exist.
It's a good idea. I did some research, and it's not cost effective. Particularly for me, without a job.
Making the bran is relatively simple and cheap--beneficial microbes (which you can make from whey), molasses, wheat bran and water. But I don't have bran, and no way to buy it...
But if I can make the inoculant, why bother with the bran? The bokashi process is supposed to be a relatively dry process, but other things are fermented in water so why not this?
So I'm trying it. I have a big jug of inoculant (whey as a lactic acid starter culture and potato water as microbe food), and a couple 5 quart ice-cream buckets with tight fitting lids. I layer food from our garbage bucket, smash it down good, and pour the inoculant in on top. Then more garbage, more inoculant, until the bucket is full. Then set it aside and start another. The stuff makes its own liquid and stays mostly submerged.
Results:
The first bucket stank to high heaven. The food was already submerged in its own juice when I started, so there was little chance to inoculate. When I started I poured my "starter" culture over it, smashed it down and put the lid on. The bucket was already full, so I couldn't layer the starter with the ferment. The smell did not escape the bucket.
The second bucket has an odd sweet smell but doesn't stink. Not precisely the smell I'm used to for fermentation, but not unpleasantly "off" either. I was able to layer the starter with the ferment, since I started this bucket fresh.
The third bucket is in process. Powdered milk in the bottom (since the fermentation we're looking for is mostly lactic bacteria), then garbage, then powdered milk, then more garbage. Mashed down to create its own liquid and maintain the anaerobic environment needed for fermentation. I didn't even use the culture on this one, although I'll keep it for future tests.
Update (four months later)
Bucket 1 still stank when I buried it. This can be considered the "control" bucket since I didn't get a chance to inoculate.
Bucket 2 was moldy but didn't stink the same way. Buried it next to 1.
Bucket 3 was the first real success. I used layered powdered milk and garbage, no inoculant. It didn't stink and had no mold. Buried next to 2.
Bucket 4 same process as 3. Currently fermenting
Bucket 5 same process. Currently fermenting
Bucket 6 same process. Currently fermenting
Bucket 7 just started.
This seems to be working quite well. When a bucket is about three months old I take it outside and bury it in an unused area of the garden.
Wednesday, March 7, 2018
My GreenHOUSE!!! :)
I'm in love. Fresh greens in February, volunteer tomatoes, cilantro, a place for seedlings...

Subscribe to:
Posts (Atom)