Showing posts with label lauren ritz. Show all posts

Friday, October 11, 2019

Natural Hydroponics part 2 (Growing)

With the nutrients out of the way, I put together a makeshift hydroponics tank. I didn't want to buy anything, so I used a big plant pot with a sheet-plastic liner and a cover over the top which I drilled four holes in. It fitted down into the tank so the net pots holding my plants were initially touching the water line.

I added ash, powdered eggshell, and my chosen nitrogen source. I also added some vinegar to cancel out the alkalinity of the ash. I put in two cucumbers (one from my own seeds and one purchased) and a seedling tomato, leaving one space open to add water if necessary.


The plants thrived. Then one day, they didn't. It was literally overnight that I saw signs of a nutrient deficiency on my tomato. At the same time the cucumber plants started shriveling and drying up in the sun. They recovered overnight, but it worried me.


I researched and learned that what I was looking at in the tomato was a sulfur deficiency. I put in epsom salt (I'll do more experimentation next summer on a natural source for sulfur) but nothing happened. The cucumbers continued to die. No change on the tomato.

Puzzled, I pulled the top...and found that the water level had sunk so that only about an inch of the tomato plants roots was in the water. Ack! No wonder it couldn't take up the epsom salt!

Once I brought the water level back up, the tomato recovered immediately.

It was almost too late for the cucumbers. For some reason, even though they each had a massive root system, they suffered more than the tomato from the lack of water.

Because of the mid-season emergency, the tomato got blossoms late. The tiny tomatoes were nipped this morning.

The cucumbers recovered to a certain extent, and even got more blossoms, but only a few small cucumbers. Since they were heavy with fruit when the water level dropped, I know the nutrients were working. It was only my own mistake that prevented this season's hydroponics from being a rousing success.

The non-chemical nutrients work. This winter's job is to figure out amounts, percentages, and get a baseline on what different plants need. Right now the hydroponics dry bean in the basement is thriving and has beans on it.

We'll see.

Natural Hydroponics part 1 (The nutrients)

This year I started a new project. Up to this point I have ignored hydroponics.

Traditional hydroponics is an expensive proposition, requiring tanks, flooding, pumps, timers, lights (more or less optional) and chemical nutrients among other things. If these things are not precisely balanced and continuously operational, the system dies.

I am not "traditional" in any sense of the word, and I absolutely refuse to use chemicals on my property. I also have no income at the moment so buying all the STUFF required is beyond me even if I wanted to.

I discovered Kratky hydroponics some time ago, but again it needs chemical nutrients. Kratky hydroponics is a water-air static system, requiring a bucket and a net pot or similar to put the plant in. The water level gradually decreases over time, leaving a space for air roots (roots that grow in the air to capture oxygen) and the main mass of the roots deeper in the water.

This is essentially what happens in the soil, as water is not always available and the plants use the roots to gain oxygen as well as water. Except with Kratky hydroponics the water eventually reaches a static level which the operator has to maintain.

So the technical pieces of the system can be dispensed with, if you're careful. Kratky actually suggests that his system be connected to an automatic float to keep the water at the safe level.

The next part was chemicals. If I'm not buying chemicals, what can be used? In accordance with my own determination to use nothing that can't be sourced naturally and within a reasonable distance of my home, I started researching various easily obtained substances. The two I settled on were ash and eggshell.

Ash contains a lot of nutrients, primarily calcium, potassium, phosphorus, magnesium, aluminum, and sodium. So approximately a 0-2-4 NPK, and holding many of the nutrients needed for plant growth. Not complete yet, though.

Eggshell contains calcium, protein, strontium, fluoride, magnesium, selenium, manganese and molybdenum. It can include other things depending on what the chickens have been eating, but that's the base. So nothing added to our 0-2-4 NPK, but more nutrients that are needed for plant growth.

But still not complete. I was missing, among other things, iron, nickel, and copper. For iron I used an old rusted nail. For nickel and copper I used a penny (US) and a dime.

I later discovered that I didn't have sulfur either, so I'll be doing additional tests next summer to see if I can find a substitute for that.

There are easily acquired sources of nitrogen under most circumstances--take the time to do your own research and figure out that part for yourself if you decide to try this. Many of these sources provide additional nutrients, so keep that in mind. It will not only bring your N up, but also possibly the PK depending on what you use.

Part 2

Sunday, September 29, 2019

2019 Project Update

Man, it's been a while. Fall of 2018 since I wrote anything here.

Updates first:

The watermelon landrace is meh. Four melons this year, none of which have matured yet. All have the Ali Baba patterning, but two of the four surviving plants have the icebox size melons. The plants that were supposed to be the primary female parent didn't survive the spring. I'll plant them in the greenhouse next year and transplant so I make sure I have the crosses I need.

The commercial variety sweet potatoes appear to be doing exactly what I want. Because of the dry conditions they're sending their roots deep. Most of those roots will not be harvested, but will remain in the soil to provide compost. The sweet potato breeding project is in its first year and I got two well adapted plants that produced flowers. I'll be keeping those two and planting them next year to evaluate.

Dry bean landrace is going to have to be restarted next year. I keep trying to do too many things at once--in this case, inter-planting non-adapted dry beans (to get the start of a landrace) in a dry area that doesn't get much water, where the soil doesn't hold water well, without mulch, and in bad soil. Hm... One thing at a time, Lauren! :)

The dry garden is doing OK. The parkstrips were watered only once this year. Tomatoes, squash, pumpkins and sunchokes all thrived. Still getting too much water, I think, because it's the "dry" stuff like echinacea and irises that are struggling. The main dry garden has thriving tepary beans but again they're just starting to bloom. If I can't get seeds, I can't get my 1st generation and start the adaptation process.

The plum and almond trees didn't get watered at all this year. There was more mid and late season fruit drop, and the fruit on the plum was smaller and less sweet. The almonds had more empty pods and shriveled nuts, but both plum and almond still provided a reasonable harvest. The nectarine was deeply watered once a month and absolutely thrived. While water is available I'll use the once a month watering schedule for all the trees, but with the knowledge that they can still produce if that is not possible.

This spring I again planted my tomatoes in regular garden soil (primarily sand), in bad light, and with little water. The survivors are thriving and most have fruited. Next year I'll do the same, and probably every year after. My eventual goal is tomatoes that thrive in bad soil, with bad water and bad light, and still produce a decent harvest.

The bell peppers are actually producing this year. The seeds are probably (?) first generation, but previous years have produced spindly plants that don't produce before the first frost. Last year they actually started to bloom in October. I started and will start the seeds the same way I did the tomatoes. If they can't thrive here, I don't want them here.

Wednesday, August 8, 2018

Dry Farming update

This year I’ve been working on a number of projects, but because we live in a desert the water takes precedence.

One project that I was able to start this year is a dry garden.

Dry gardening (or dry farming) is the practice of planting and growing without water. Technically in order to be considered “dry” farming, the area has to get less than 20 inches of rain per year and the farmer doesn’t use supplemental irrigation.

Many areas considered “dry farming” areas leverage mild winters to plant winter crops, such as wheat, then let the land sit during the dry summer. Others plant in the summer but use mulch (often dust mulch), wide spacing, alternate year planting and other procedures to get a crop where none would otherwise grow.

I decided that for the purpose of this test I would water no more than twice a month, so it’s not technically dry by definition, but considering that the main garden gets watered every other day (more or less) every two weeks is a huge improvement.

Tucked between our house and the neighbor’s fence is a strip of dirt about six feet wide and 20 feet long. Nothing grows there, it’s in shade after about 3, it has grapevines on one side and the house on the other. The water source is our 275 gallon water tanks that collect water from the roof. The soil is sand and rock.

Call it a personal idiot-cyncracy, but I don’t like seeing dirt (not soil in this case) going unused. Since in many areas grapes aren’t watered at all, I figured it was both a good test for them and a good place to put a dry garden.

It gets about seven hours of sun. Last summer I dug down into it sometime in July and it was bone dry at least a foot down. Last fall I mulched it deeply, and this spring I planted through the mulch.

The bugs had a heyday, and all but one of the seedlings perished.


I planted again on 6/11, this time under cover. Milk jugs are incredibly versatile.


That same day I also planted a single zucchini plant / butternut combination in an area with the same circumstances but in full sun. Deeply mulched, same soil. I gave each seed 2 gallons of water.

On the same day that the picture above was taken, one month after planting...


It had no additional water—the only difference was the sun. That’s a castle block in the bottom corner, about 11 inches wide.

The dry garden was replanted on 6/11. The sun version was watered on 7/1 but probably could have gone longer. The shade version was watered for the first time on 7/9. They were all watered on 7/24 because I decided (erroneously, I now believe) that I should stick to the same watering schedule for both.

So the sun version was watered on 8/8. Today, we have this.


And this...


And then we have all the other plants in the dry garden. At least the grapes are thriving.


The one in the middle is another zucchini, of the same variety as the other.

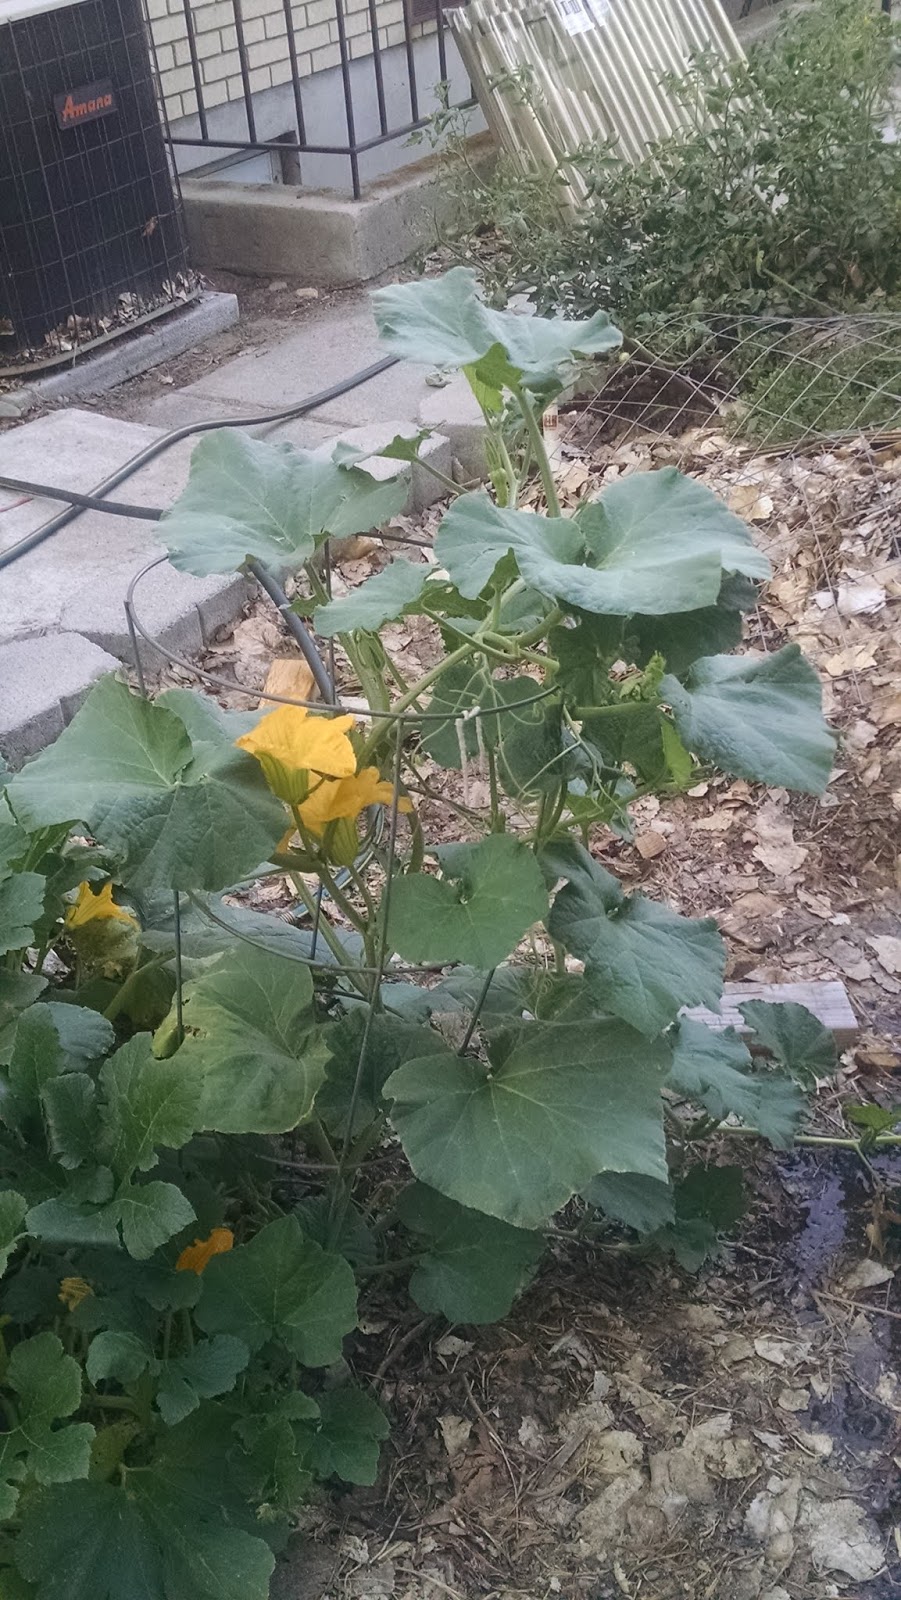
The sun made a much larger difference than I expected. The sun garden needs to be protected during the worst of the afternoon heat, but the butternut has male blossoms and the zucchini is bearing, so the little bit of extra work is worth it.

Watering every two weeks is probably too much if you have good soil. My soil is sand and rock but I could probably still stretch it to once a month if necessary. The true test will be next year, when I use the seeds I get this year and stretch the watering schedule to once a month.

I figure if they survive and fruit under these conditions they’ll be better adapted in the next generation. The ideal would be to find varieties that are already adapted to drought conditions (massive root systems, primarily) and start from there.

I never could do anything the easy way.

The first update

The second update

Original post on Dry Farming

Friday, June 15, 2018

Dry Farming update

A month since I posted last about my dry-farming test.

As a refresher, I planted three kinds of seeds and then left them alone. They were planted under a thick layer of mulch in poor soil. I put them in an area with afternoon shade so they're protected from the worst of the heat.

The insects loved the buffet I put out for them. Of the seventeen plants that came up, only one survived. Once I realized the problem I tried to protect those that remained, but only one was able to recover. Lesson learned: put out bait or otherwise protect the seedlings until they're big enough to survive insect onslaught. In a dry environment insects will go after anything "wet," and in this case that's the seedlings.

A week or so ago I replanted, digging small pits to hold the seeds and setting topped milk bottles in the holes surrounded by soil to keep the insects out. So far six have sprouted, including one that came up from the original seeds. With the one remaining from the original planting we have a total of seven. I am expecting that more will come up in the next few weeks. Several are already getting their secondary leaves. I intend to leave them covered until they fill up the covers.

The next watering is planned for 7/1, since I watered the new plantings when I put the seeds in. I will only water if the soil appears to need it or the plants are seriously struggling. If the soil still appears wet at that time I will plan to water on 7/15, and so on.

The goal is to water twice a month at the most, hoping that I won't have to water at all (unlikely as that might be).

The first update

The second update

Original post on Dry Farming

Watermelon Landrace Update

On May 15th I planted the watermelon patch. Since I'm doing a landrace I planted the pollinators (Congo, Joseph Lofthouse Landrace and Hopi Red) on three corners of the patch. Those were started in the greenhouse. The Hopi Red and JLL were immediately eaten by insects, the Congo had no problems so it is considerably further along than the rest.


On the same day I planted 25 watermelon seeds from last year's crosses.

At this point (6/15) there are 15 left. Others failed to thrive (2) or were entirely eaten by insects. Several didn't come up at all.

Of the fifteen, three are obviously thriving.


Others...aren't.


Most of them are somewhere in between.

To this point I've only been removing those that were obviously dead or dying--seed leaves without any green, secondary leaves not developing. At the end of June (probably) I'll be sorting it down to five.

I'm tempted to leave more than five, although that would probably crowd them too much. These fifteen survived the sandy soil, lack of water, intermittent heat and cold, insect attack, and even being stepped on (oops). My plant-brain says they deserve to survive. The thinking brain says get rid of the weakest.

We'll see.

Watermelon Landrace

This was scheduled to be published 5/25 and it didn't happen

In short form, a landrace is a locally adapted variety of a plant, often a food plant. Up until the advent of "perfect" food requirements in grocery stores, landraces were the norm rather than the exception. Farmers would trade seeds, knowing from experience that different varieties made for stronger plants.

Over generations, much of that landrace heritage has been lost, to the point that most people believe hybrids to be bad or weak. We plant one variety of squash, one variety of tomato, one variety of beans, and then when the circumstances aren't precisely right for that plant it dies or doesn't produce. This is the plant kingdom's version of siblings marrying generation after generation after generation. Of course the genetics are going to be weak.

With humans we accept the fact that inbreeding is a problem, but in our food we want stability and perfect taste, and we breed for those things. As variations are deliberately bred out of our crops, so are the abilities that made their ancestors thrive.

I've said before and I'll say it again (probably often) that I want strong, self sufficient monster plants that will spit "not good enough" back in my face and thrive in spite of my neglect. In order to do this we need to have variety in the plant genes. There have to be ancestors that thrived in desert conditions, ancestors that resisted insect attack, ancestors that have the perfect taste we love, etc. Over time it all comes together.

Last year I started a watermelon landrace, so this year I should get a bunch of first generation hybrids. Last year I ended up with four varieties of watermelon--Jubilee, Sugar Baby, Ali Baba, and an old variety that I've been growing for years. I have no idea what the ancestry is, so I just call it Traditional.

I pollinated a bunch of flowers, but only one survived (this is normal for watermelons). It was an Ali Baba female parent, crossed with Sugar Baby and Traditional. So this year I should get Ali Baba-sugar baby crosses and traditional-Ali Baba crosses. That being the case, I will not be planting Ali Baba, Sugar Baby, or Traditional. I will be re-planting Jubilee, but only as a pollen donor.

Three new varieties will be introduced into the landrace this year; Congo, Hopi Red, and Joseph Lofthouse Landrace. Congo I already have seeds for but it got eaten by bugs last year. Hopi Red (an established landrace) is drought tolerant, and the JLL includes hundreds of different varieties.

I will watch and see which plants the bugs and snails like, which take off and thrive in my yard, which shrivel at the first hint of cold, and probably about mid-June I'll cull the landrace patch to the strongest. I'll leave the Hopi Red, Congo and JLL--they will be pollen donors only, I won't be keeping seeds from them. The seeds will be taken from the Landrace watermelons that survive.

This is the "hybrid" year, working with first generation crosses of three heirloom varieties. 2019 will be the first year we start to see the results of true variety mixing, and first generation hybrids with the new varieties from 2018. 2020 should be the turning point with my watermelon landrace, meaning the point where I'll begin to see true adaptation to my environment, my water, my soil.

Tuesday, May 22, 2018

Garden Update

This year is a little different than last because I have the greenhouse. It seems to have moderated my planting addiction to a certain extent.

About mid-April I was thinking about planting watermelon at the beginning of May and went back to my records to see if that was too soon, only to discover that last year I planted them in March. MARCH!? There's snow on the ground in March! Good grief. So no, May is not too soon.

Greens are going full bore. They are naturalized in my garden and come up every year, although I'm not sure how that's going to work with the mulching schedule. Every 7 years each area of the garden will get a thick layer of leaves. So we'll see. Lots of salad! Radishes are also naturalized in the same area, and interestingly enough where those things are growing there are no weeds.

Beans are up. Hidatsu Red and Hidatsu Shield by the bean towers, two varieties of tepary beans by the fence. The tepary beans are a trial this year, a drought tolerant type of bean from the Southwest US. I planted the green beans two days ago and the dry beans yesterday. Kidney beans will also go by the fence, as they're supposedly a climber. 60% germination on that one so far, for beans purchased from the grocery store four years ago.

Watermelons were planted out last week.

Two Joseph Lofthouse winter squash in front beside the almond, along with a mystery squash that was a gift. One cantaloupe, also a gift, seems to be doing well. I planted more cantaloupe in the same area. Three zucchini are up under the walnut. The Black Beauty Zucchini don't seem to be germinating well. I planted more zucchini and yellow squash as a border around the new garden area.

On the east of the house is an area that has been designated as the "dry" garden for this year. The plan is to water it at most once a month during the summer. It's the start of developing drought tolerant varieties and learning about dry farming. Eleven seedlings up and starting to get secondary leaves.

Friday, May 18, 2018

Dry Farming

This is my first year for a real dry farming test. Just briefly, dry farming is done in arid or semi-arid areas and does not require supplemental watering. It is considered dry farming if the farmer gets less than 20 inches of rain per year and does not use supplemental irrigation.

Not many do it anymore. Few ever did. But in a world of increasing weather tumult (hotter, colder, wetter, drier, storms more violent and frequent, etc) it seems to me that if we want to eat we need to relearn how to dry farm.

My area gets between 10 and 12 inches of rain in a normal year. Not a lot, but considerably more than some other areas. Still low enough that we're considered a desert.

I have selected several varieties of squash (pumpkin, butternut, spaghetti squash) that will be the basis of my first test. All three were planted last year in a dry area of the yard and still produced. Likely I will end up pulling out the pumpkins, as I inadvertently planted the same variety in another area. That leaves butternut and spaghetti squash, both winter squashes.

I planted six clusters of nine seeds, three seeds of each variety. I have watered them once since they were planted, and whatever comes up is my test for this year. The area is covered with leaves from last fall and will get no supplemental watering unless I do it. Two plants have come up already and I covered them to keep the birds off.

The goal is to water once a month, or less if it rains, so since it's raining today the next water schedule would be mid-June. Aside from testing the limits of dry farming, these plants are the start of my drought tolerant varieties. If I can get one fruit from each plant under those conditions, this is the 2nd year of that development.

I've said it before, but I want strong, self-sufficient monsters that will spit "not good enough" back in my face and thrive in spite of the conditions.

Original post on Dry Farming

2nd update

Wednesday, March 7, 2018

My GreenHOUSE!!! :)

I'm in love. Fresh greens in February, volunteer tomatoes, cilantro, a place for seedlings...

Monday, March 13, 2017

The effectiveness of a pinned post

I have one post (on vinegar craving) that still gets about 200 hits per week after five years. I can see that the posts to either side of it get more hits than most of my other posts, but few people go so far as to search out the homepage and see what I'm currently writing.

So I did a test. For three days I "pinned" the vinegar craving post, just to see if there was a difference. Taking into account that there are a LOT of comments on that post and it would take a long time to scroll down through them, I expected that the post just after it would have a few more hits. Probably just because of proximity. I think the system counts it as a view even if the individual just scrolls to it in getting past the previous post. If the skuttlebut about a pinned post driving more traffic to other posts is accurate, then the posts beyond the first should also see an increase.

During the test period the next post down (True Potato Seed update) got 18 hits, about triple the usual, but no comments. The posts below it got no more than usual.

I have concluded that the idea of a "pinned" post being a draw for traffic applies ONLY if the audience is the same for both posts.

Monday, January 9, 2017

Using wild yeast for bread

Using wild yeast isn't as simple as capturing it. Maybe it doesn't like being imprisoned. Who knows?

Initial post on capturing wild yeast here.

Each variety of yeast has its own personality and its own needs. I made yeast from four different kinds of fruit--apple, orange, plum and raisin. The initial "feeding" was done with flour I'd milled myself, and I'd grown the wheat. On that one, apple and raisin did the best with apple ahead. Plum just sat there, sulking. Orange raised, but wasn't outstanding. When I did the second feeding I used white flour since I ran out of the other.

Raisin went crazy, doubling in size in less than six hours. Apple sulked at the change in diet and orange just tagged along, riding on the others' laurels. Plum was still sulking from the first offense. I immediately used the raisin to make a small batch of bread, and fed it again.

I had the original liquid left over, and since orange and apple showed no sign of fungus I dumped the leftover fruit and made another starter for those two "flavors" of yeast.

Here comes the tricky part. I hadn't measured the water precisely, but the original was about the same amount for each. When I added flour and water for the starter I measured it, putting in 1/4 c of flour and 1/4 c of water each time. So theoretically they all had the same amount of water to start, within a teaspoon or two. When I put the starter liquid in the starter jars, I measured it at 8 ml (almost two teaspoons) for each jar.

I used half a cup of starter with my "raisin yeast" bread loaf. I cut the recipe in half so I used 1 1/2 c of flour and 1/2 c of water since the starter was liquid as well. The dough was dense, dry, and resisted kneading. I added water a little at a time until it was the right consistency, and let it rise overnight.

I decided to get rid of the "plum" starter, since it wasn't doing anything, so I added 1 1/2 cups of flour and 1/2 cup of water...it soaked up the water and was messy-sticky. I had to add flour.

Then the apple starter and the orange starter from the original bottles. The orange starter came out in a lump, the apple starter came out soggy, with lots of water in it. So I added 1 1/2 c of flour to the apple starter, and added both flour and water to the orange starter. The orange came out perfect, the apple needed slightly more flour.

The only real difference between them all was the yeast culture--precisely the same amount of culture, the same amounts of water and flour, but the outcomes were entirely different.

The raisin loaf is dense, with a soft crumb and a crunchy crust. Because of the wheat flour used in the original feeding it has a wheat flavor. The wild yeast didn't seem to make a significant difference to the taste. But the smell! Oh, my. I would bake every day just for that smell!

The plum loaf was definitely sourdough, but with a faint fruity taste that doesn't linger. The crumb is light but dense.

The orange loaf was dark and crunchy, with a flavor that's difficult to describe. It smelled really sour going into the oven, but coming out the taste wasn't even sourdough but completely different. The texture is almost like a cake rather than bread, but not dense--just a little stiffer than I'm used to bread being. Almost like focaccia.

The apple loaf is very light in color and has a very mild sourdough flavor, but again it's different from any sourdough I've had before. The smell is fruity but there's none of the fruit flavor. It isn't dense, but the crumb is strong and resists tearing. The crust is extremely chewy.

I could get addicted to having bread that has a different flavor every time I bake.


Based on this test, the rankings of the 4 types of yeast are:

1 Raisin
2 Apple
3 Orange
4 Plum

Monday, January 2, 2017

Yeast

I've always thought that yeast is boring. I mean, you take it out of a bag--boring. It's a uniform color and it makes bread rise. It's also a finite commodity--in an emergency, once it's gone, it's gone. But there's yeast in the air all around us. I've investigated capturing wild yeast but it's a long drawn out process and takes lots of resources--if you're baking bread every few days great, but if you get a strong culture it grows so fast that anyone else can't use it all and it dies. Or you keep feeding it and use all your flour just keeping the thing alive.

Then I ran across a mention of using fruit yeast. The white bloom on grapes, plums, etc? Yeast. There's yeast on every fruit and every bark and every leaf, just waiting. If I can harvest yeast that easily, then why bother keeping a culture alive? Start a new one every month or so.

I didn't have any fresh fruit to test my hypothesis (aside from oranges) so I used raisins from last year's harvest, a dried plum from last year's harvest, a piece of dried apple from two years ago, and a piece of fresh orange peel.


After four days bubbles were starting to appear in the water, and three of the four smelled "yeasty." The plum just smelled fermented. The raisins and plum had fungus hyphae in the water.


I took 1/4 c of flour and 1/4 c of filtered water and put them in jars with about 2 teaspoons (8 ml) of liquid from each bottle.

Less than 24 hours later the dough was already rising. The strongest (most bubbly) was apple, followed by raisin, orange and plum in that order.


Plum had bubbles but hadn't started mounding yet. I fed them another 1/4 c of flour and 1/4 c of water, put them in larger bottles and put them away again. The orange had a sour orange smell, the apple just a faint hint of apple, the plum just smelled like fermented plums, and the raisin like raisins. All had a yeasty smell. At this point I had cut out a week, possibly two, from the process of collecting wild yeast.


The original bottles had lost their "yeast" smell, with the exception of the apple which had a very strong yeast smell. I assume the bacteria and fungus had taken over the other three bottles.

The orange, apple and raisin had visible rising within a few hours. Raisin more than doubled in about six hours and overflowed its bottle so I used half to start a batch of bread.


Based on the test, this process is both simpler and more predictable than trying to capture a wild strain of yeast by setting your culture out on the windowsill or under a tree. Any fruit should work--if dried fruit several years old provided an immediate result, fresh fruit would probably be better. It also isn't necessary to have a full jar of mashed fruit--less than a tablespoon of each kind resulted in usable yeast growth within a few days.

Post on baking with this yeast

Wednesday, February 26, 2014

Something to work on

The crazy herb lady is at it again. I'm bouncy and excited that spring! spring! spring! is here, so yesterday I spent most of the day outside--and today I'm feeling it.

It shows me how important exercise is. Honestly, I hate the treadmill. Walking outside is fine during the summer, but during the winter it's both cold and dangerous. Walking on the treadmill is boring, but the way my legs were hurting last night (after just carting some leaves around and doing a bit of digging!) tells me that I need to make this a priority.

Eating healthy is just one piece of the puzzle. I also have to make sure that I keep in decent shape, keep my brain active and maintain some semblance of a social life. If I intend to be living on my own at 80 or 110, I need to take care of what I have. Which is a really weird thought, you know? I'm halfway there.

I don't feel like it. I don't notice that I feel that much different than I did at 20. Just happier. And I want to keep it that way, which is going to require some effort on my part.

OK. So treadmill walking or neighborhood walking (I won't run on a regular basis because I want to keep my knees and hips, thank you very much) every day. Targeted exercise...the problem is that I see these things as taking time away from my writing. I need to work on that.

Sunday, February 17, 2013

My health diagram

Many years ago I learned that I loved diagramming sentences. The idea that a sentence had an easily discernible and LOGICAL structure was amazing. Being able to take a sentence apart and figure out which pieces were most important, to build a skeleton with the pieces, made me giggle. Literally.

The ability to diagram sentences has no logical use in this world, but I can use the diagram structure in other ways. For example, if I have a serious cough. How did it begin? After exercising. (Assumption, lung irritation) Why did it begin? Unknown.

Symptoms are the second step of the diagram. The main line (the sentence core, the subject of the sentence) is the cough. That's what I'm trying to remedy.


Is it worse at night or during the day? Worse at night

Is it worse standing or lying down? Lying down

Is it worse outside or inside? Inside

Is it worse at home or at work? Neither

Does exercise aggravate it? Yes

Lots of etcetera; whatever questions the situation calls for. If I determine that there may be an emotional connection I use different questions and go deeper.

In this way I can construct an assumption of what is causing this cough. Along the way I can come up with possible remediations, things that will make the cough easier to deal with such as sleeping partially upright or taking antihistamines. [*** see below.]

Based on the information as I built my diagram, this does not seem to be disease related. If the diagram indicated it was worse at work or at home I could suggest that the cause was environmental (such as mold, or temperature). If it got worse when the air quality was lower I could suggest that it was related to that. If it's not environmental, I go on to the next level.

The structure of the diagram has four sub-clauses; Situation, symptoms, remediation, and diagnosis. There would normally be a fifth clause, treatment, but I don't want anyone accusing me of practicing medicine.

There are three levels to the diagnosis--Disease (external), physical/environmental (internal) or emotional (internal). Technically I could add a few more layers.

Once I determine whether it's physical or mental, internal or external, I have a much better chance of choosing treatments that will work.

Mental is a subject for another post, or maybe a series of them.


***Do not confuse a remediation with a cure. They are totally different things. Many pharmaceuticals are in the remediation category, controlling symptoms but doing nothing for the disease.